Follow this step-by-step guide to integrate your Bukku Accounting System into Boxify smoothly.
🔰 Step 0: Navigate to Bukku Integration in Boxify
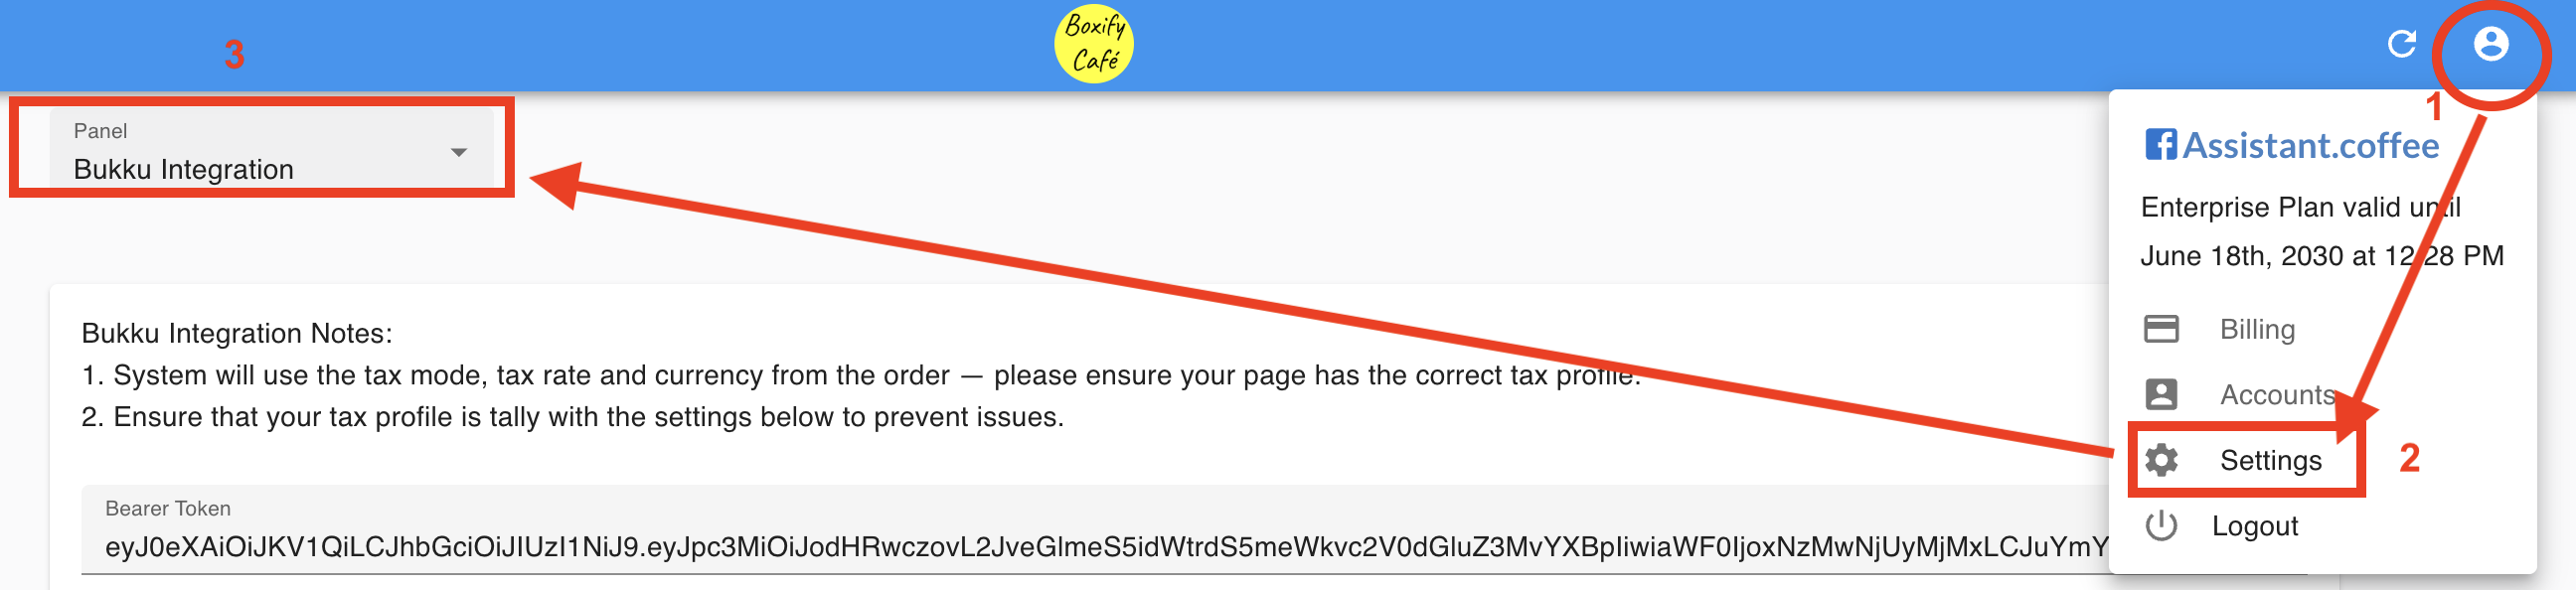
- Log in to your Boxify account.
- Click on your Profile icon at the top right corner.
- Select “Settings” from the dropdown menu.
- In the left panel, choose “Bukku Integration”.
Now you’re ready to begin the setup.
1️⃣ Bearer Token & Subdomain
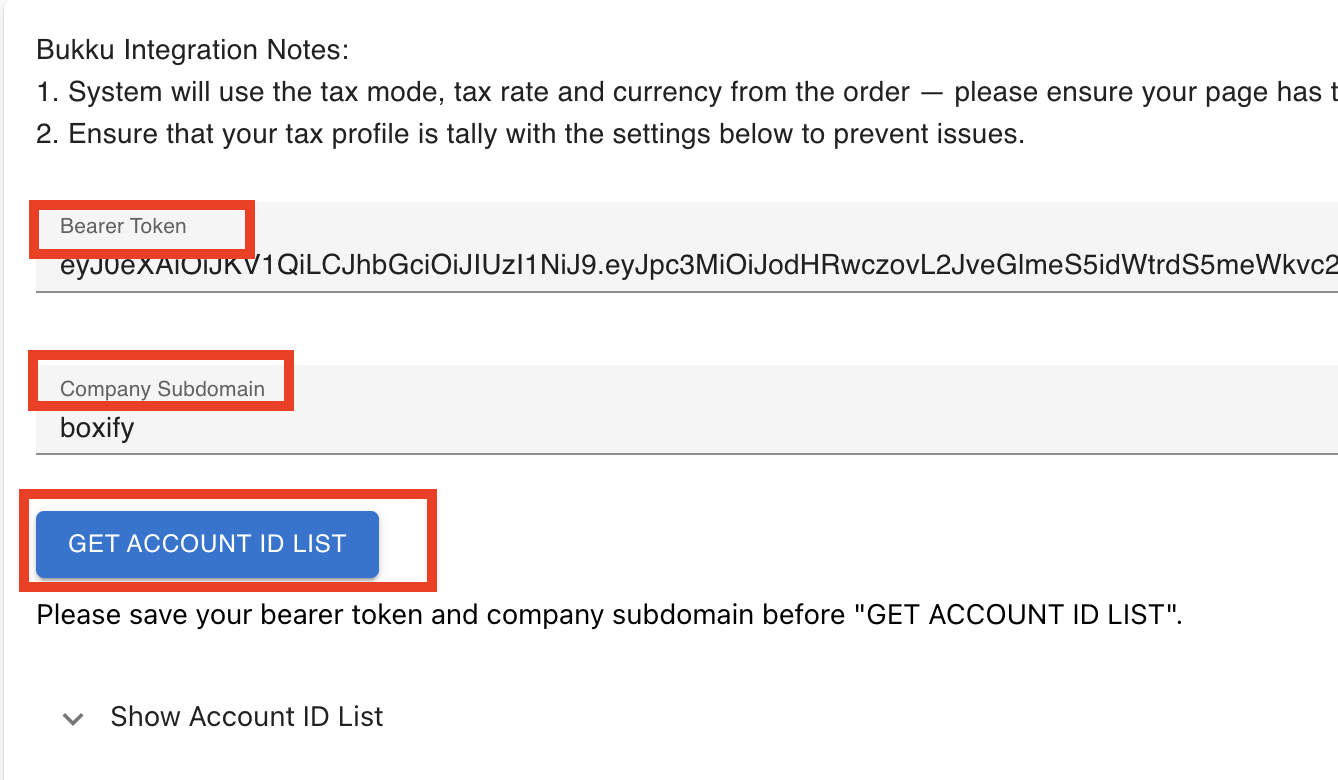
🔧 How to Get It:
- Log in to your Bukku Accounting System.
- Go to Control Panel → Integration.
- Copy the Access Token and Subdomain.
- Paste them into the corresponding fields in Boxify.
- Click Save.
- Then click “Get Account ID List” to retrieve your Chart of Accounts from Bukku.
2️⃣ Order Item Tax Code ID
If your product is inclusive of tax, select the correct Tax Code.
✅ To cross-check in Bukku:
- Go to Control Panel → Company Setting → Tax tab
- Refer to Default Sales Tax Code
3️⃣ Order Item Account ID
Choose the account used to record sales income.
- Use the “Show Account ID List” button in Boxify to see available accounts.
- Example: If “Sales Income” has ID
20, enter 20 in the field.
4️⃣ Order Item Classification Code
Refers to the product classification code in Bukku.
✅ To cross-check in Bukku:
- Go to Products & Services in Bukku.
- Click on a product.
- Scroll to Location & Categorization → Classification Code.
- Select the same Classification code as Bukku in Boxify.
5️⃣ Deposit Payment Method
Set the payment method used for deposits (e.g., Bank Transfer).
This will be reflected in the invoice generated in Bukku.
6️⃣ Deposit Account ID
Select the Account ID where deposit payments should be recorded in Bukku.
- Use the “Show Account ID List” button in Boxify to see available accounts.
- Example: Bank Account ID
3, enter 3 in the field.
7️⃣ Shipping Fee Account ID
Similar to Order Item Account ID.
Choose the Account ID to record shipping fee.
Example: If you want it recorded under Sales Income (ID 20), enter 20.
8️⃣ Shipping Fee Tax Code ID
Does your shipping fee include tax?
- ✅ Yes → Select the appropriate Tax Code
- ❌ No → Select “No Tax Code”
Cross-check in Bukku’s Company Setting → Tax if needed.
9️⃣ Shipping Fee Classification Code
Same as product classification in Bukku.
✅ To cross-check in Bukku:
Bukku → Products & Services → Product → Location & Categorization → Classification Code
🔟 Customs Form No. / Customs K2 / Incoterms
These fields are for Malaysian customs declarations.
- If not available yet, leave them blank.
- You can edit the invoice in Bukku later once you have the required info.
✅ Final Reminder: After completing all fields, click Save in Boxify to apply your Bukku integration settings successfully.