How to Create Product Categories in Boxify Webstore
Purpose: Organize your products into groups like “T-Shirts”, “Bags”, or “New Arrivals”.
🛑 Important: Your webstore will not display if there are no categories.
✅ You must create at least one category before products can be shown in your webstore.
✅ Steps:
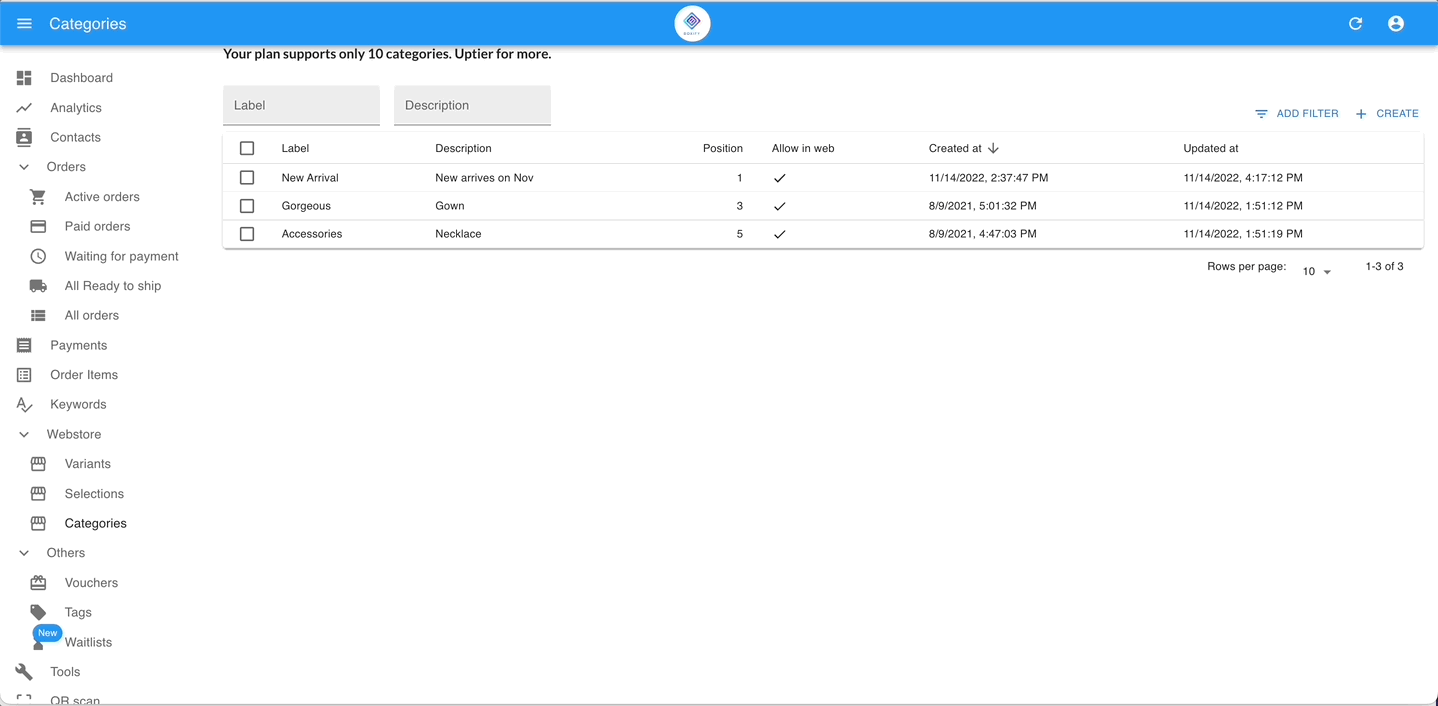
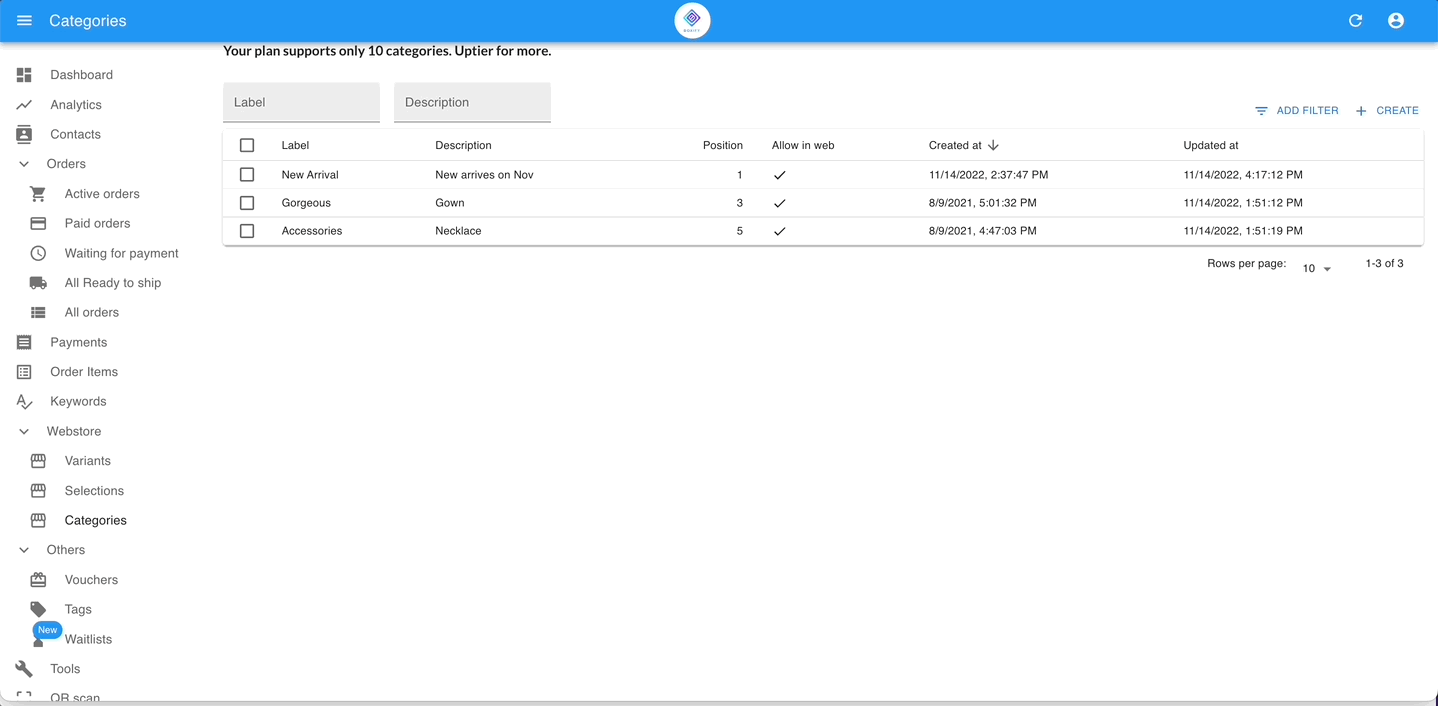
- Go to Webstore > Categories.
2. Click + Create Category.
3. Enter the Category Name (e.g., “T-Shirts”).
4. Fill in the Position – this number controls the display order (e.g., 1 will appear first, 2 second).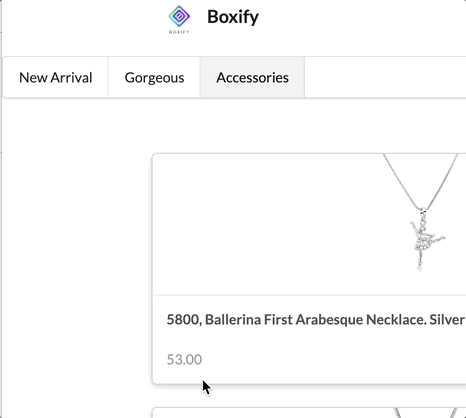
5. Optional: Add a Description or assign Selections (e.g., “Color”).
6. Click Save.
💡 Tips:
- Use lower numbers for categories you want to show at the top.
- You can come back later to reorder categories by changing their position.
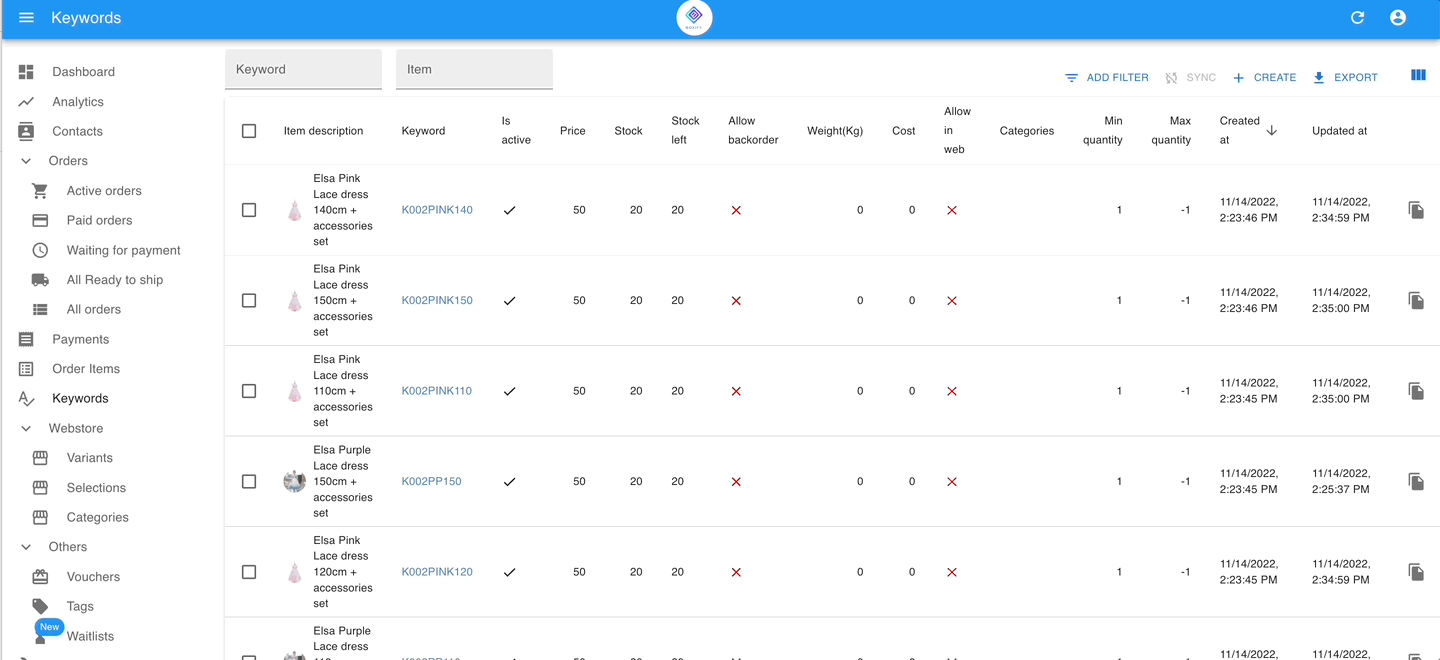
Assign the category to the keywords
🛒 Assign to a Single Product:
- Go to Keywords.
2. Click the product and choose Edit.
3. Scroll to Category, Choose the category the product belongs to (e.g., “T-Shirts”).
4. Click Save.
🛒 Assign to Multiple Products (Bulk Edit):
- Go to Keywords.
2. Use filters or select multiple products manually.
3. Click Edit Categories & Variants.
4. Tick the boxes for Category. Assign the same category to all selected products.
5. Click Save.