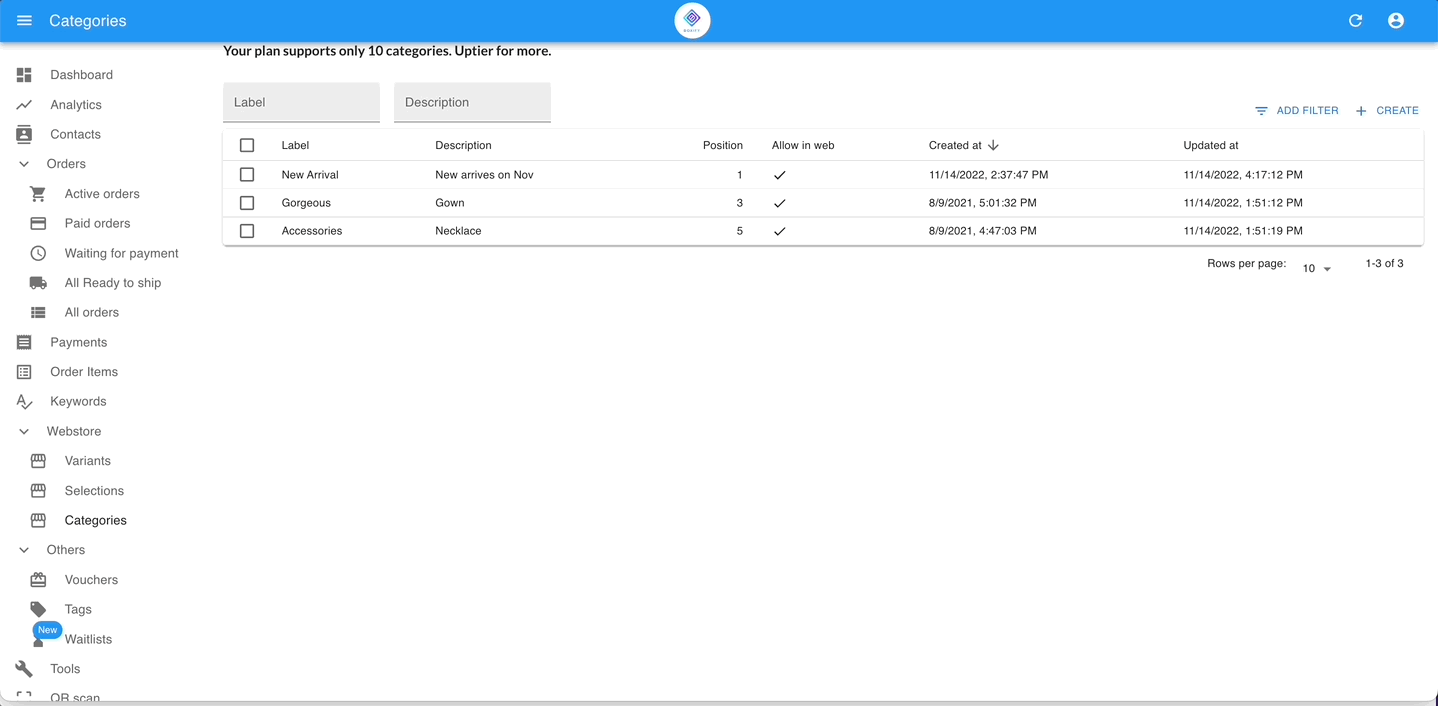
The first criterion to display the webstore is to create at least one category.
The Steps to create the category.
Step 1: Go to WEBSTORE > CATEGORIES from the menu on the left, and click the button ‘+CREATE‘.
Step 2: Name the label of the category.
Step 3: Put in the description for the internal remark of the category.
Step 4: Fill up the position of the category that will be shown in the webstore. (The label of the category displayed in the webstore will be sequenced according to the position here.)
2) Selections can be filled up after you have created one for this category.
The Steps to configure the category to the keywords
Configure one by one
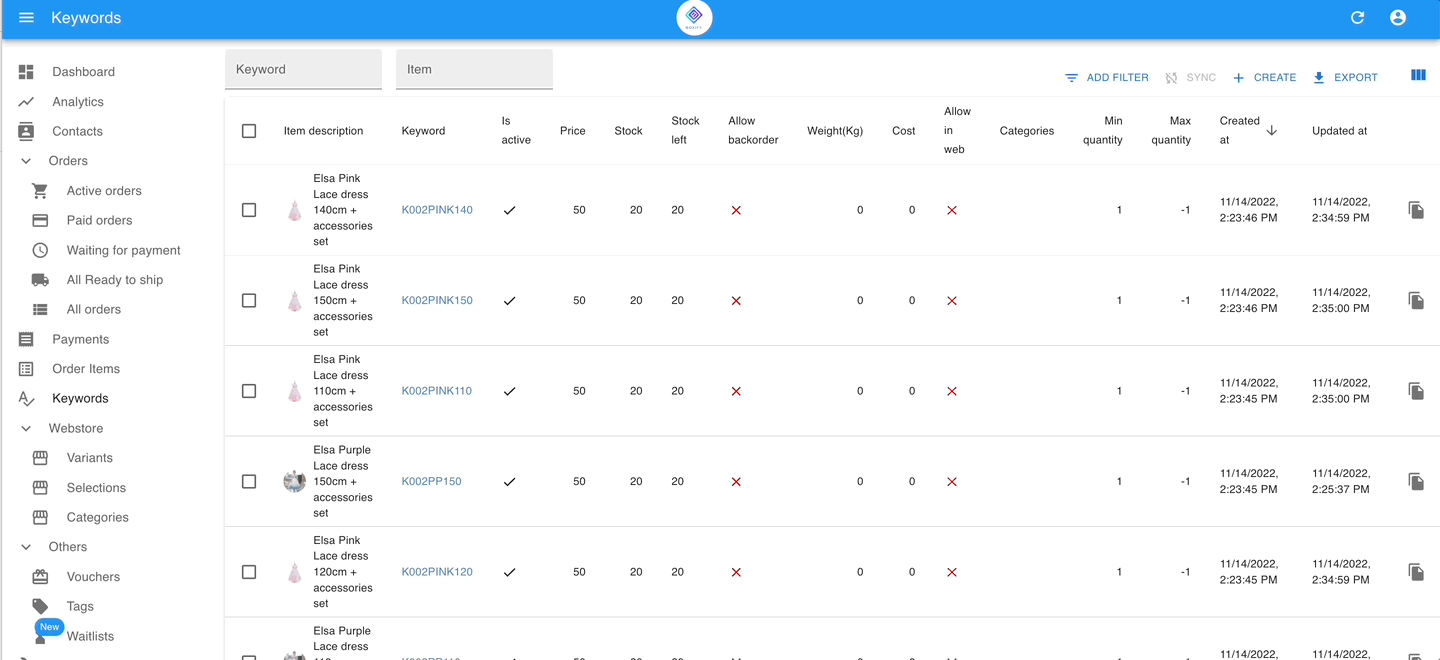
Step 1: GO to KEYWORDS from the menu on the left.
Step 2: Click on the keyword which you want to configure the category and click on the button ‘Edit‘ on the right top.
Step 3: Scroll to the ‘Categories‘ and select the category that you have created, then click the button ‘SAVE‘.
Configure in bulk
Step 1: GO to KEYWORDS from the menu on the left.
Step 2: Filter the KEYWORDS and bulk-select them.
Step 3: Click on the ‘EDIT CATEGORIES & VARIANTS‘ on the top.
Step 4: Tick the check box of ‘CATEGORIES‘ and select the category that you have created, then click the button ‘SAVE‘.