What is the order item tag?
The order item tag feature allows you to do the marking under the ordered items. It is a note for the internal admin to use to do the marking for the item.
Example:
1) You can create a tag of a PO number & tag it on the item. So, you will know that you have made the restock for the item.
2) You can create a tag to indicate the warehouse & tag it on the item. So, you will know that the item will be issued from which warehouse.
Let’s take a look at how to utilize it to ease your job.
Create the tag from the system
Step 1: Click the ‘Tag‘ from the Menu on the left.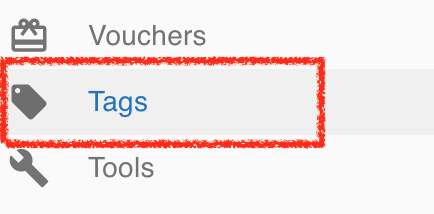
Step 2: Create the Label for the tag. Example as the image below.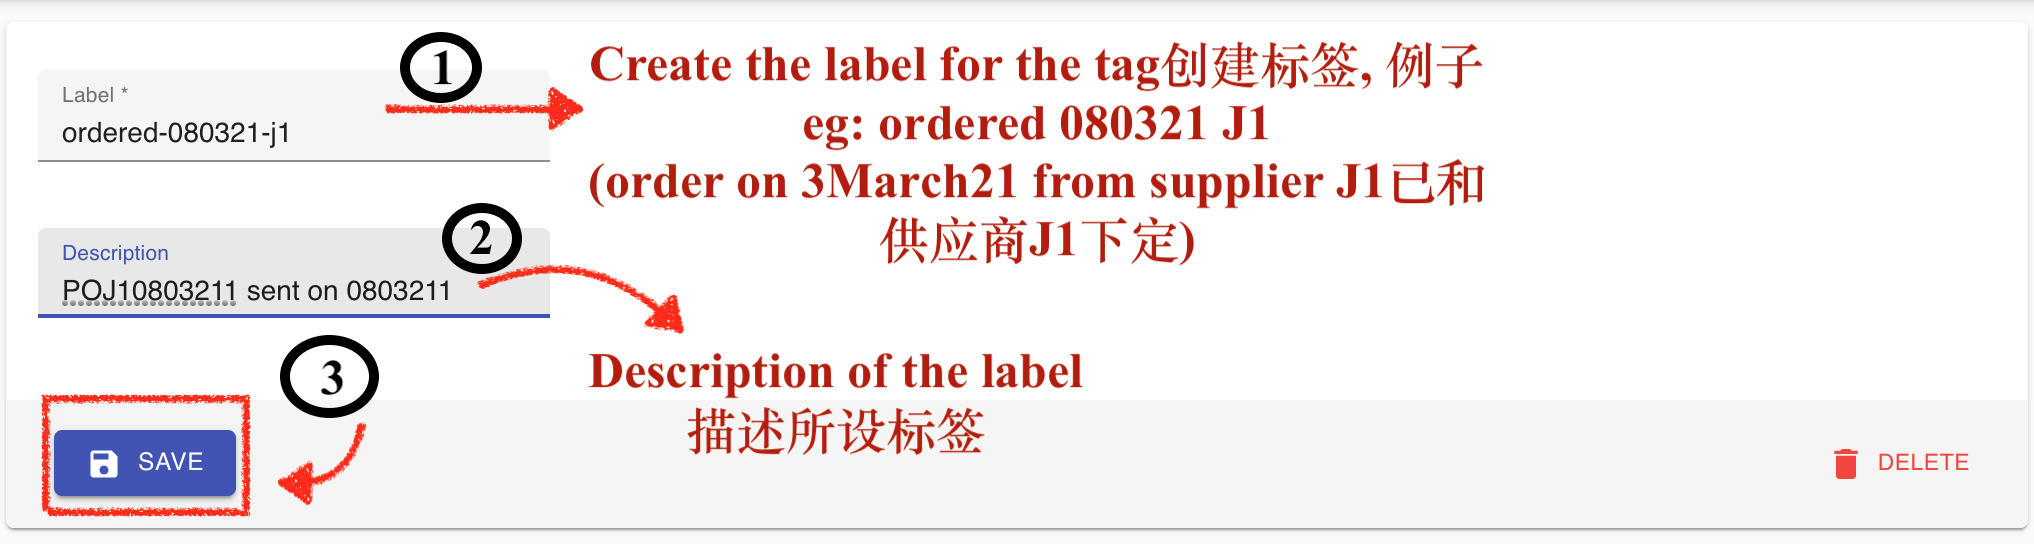
How to label the tag for the ordered items?
Step 1: Click the ‘Order Items‘ from the Menu & do the filter to search for the ordered items.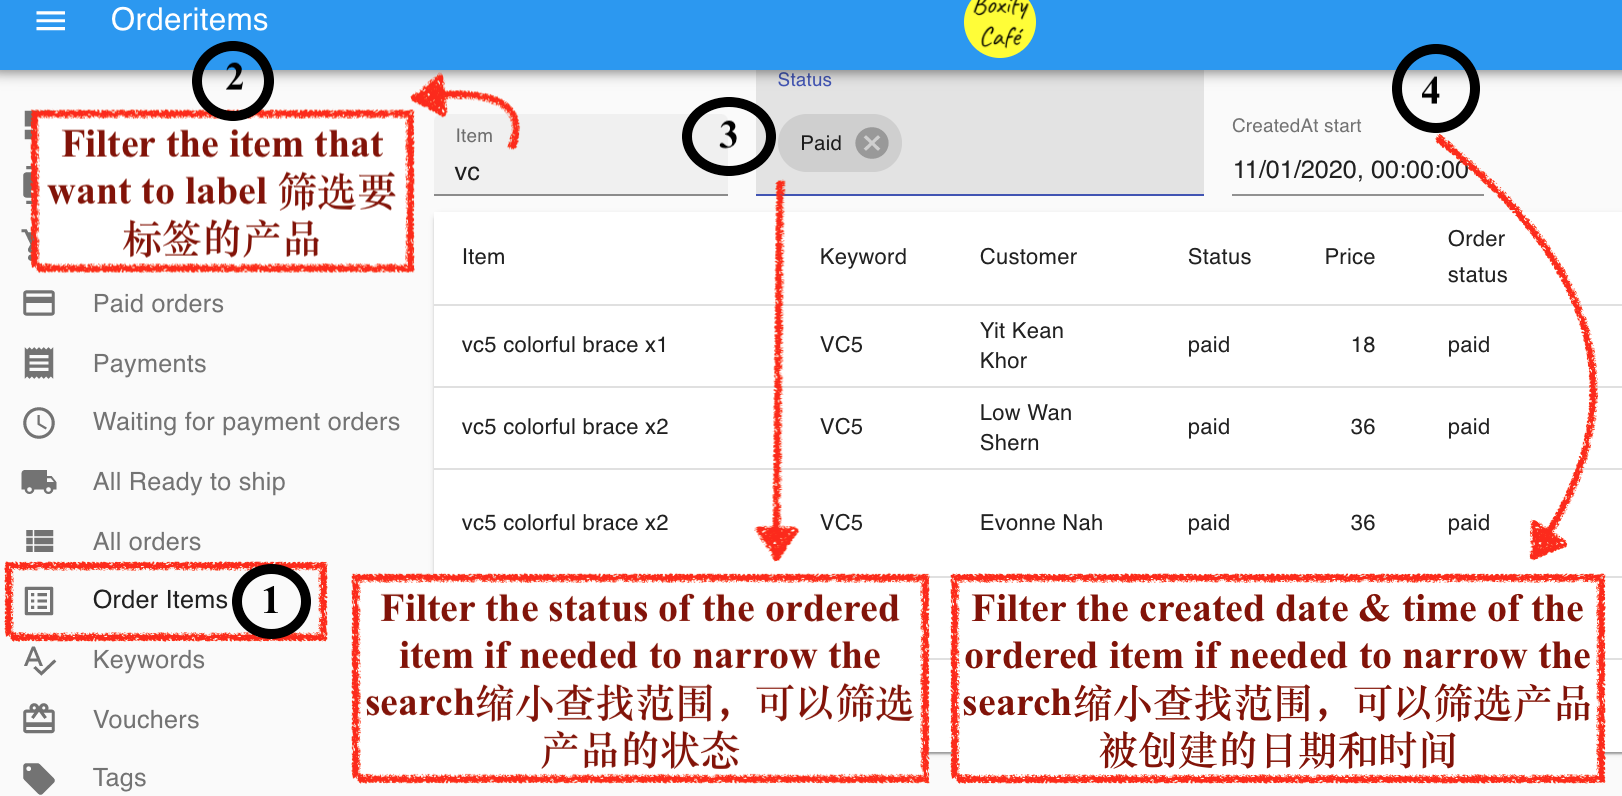
Step 2: Click on the ordered item to add the tag.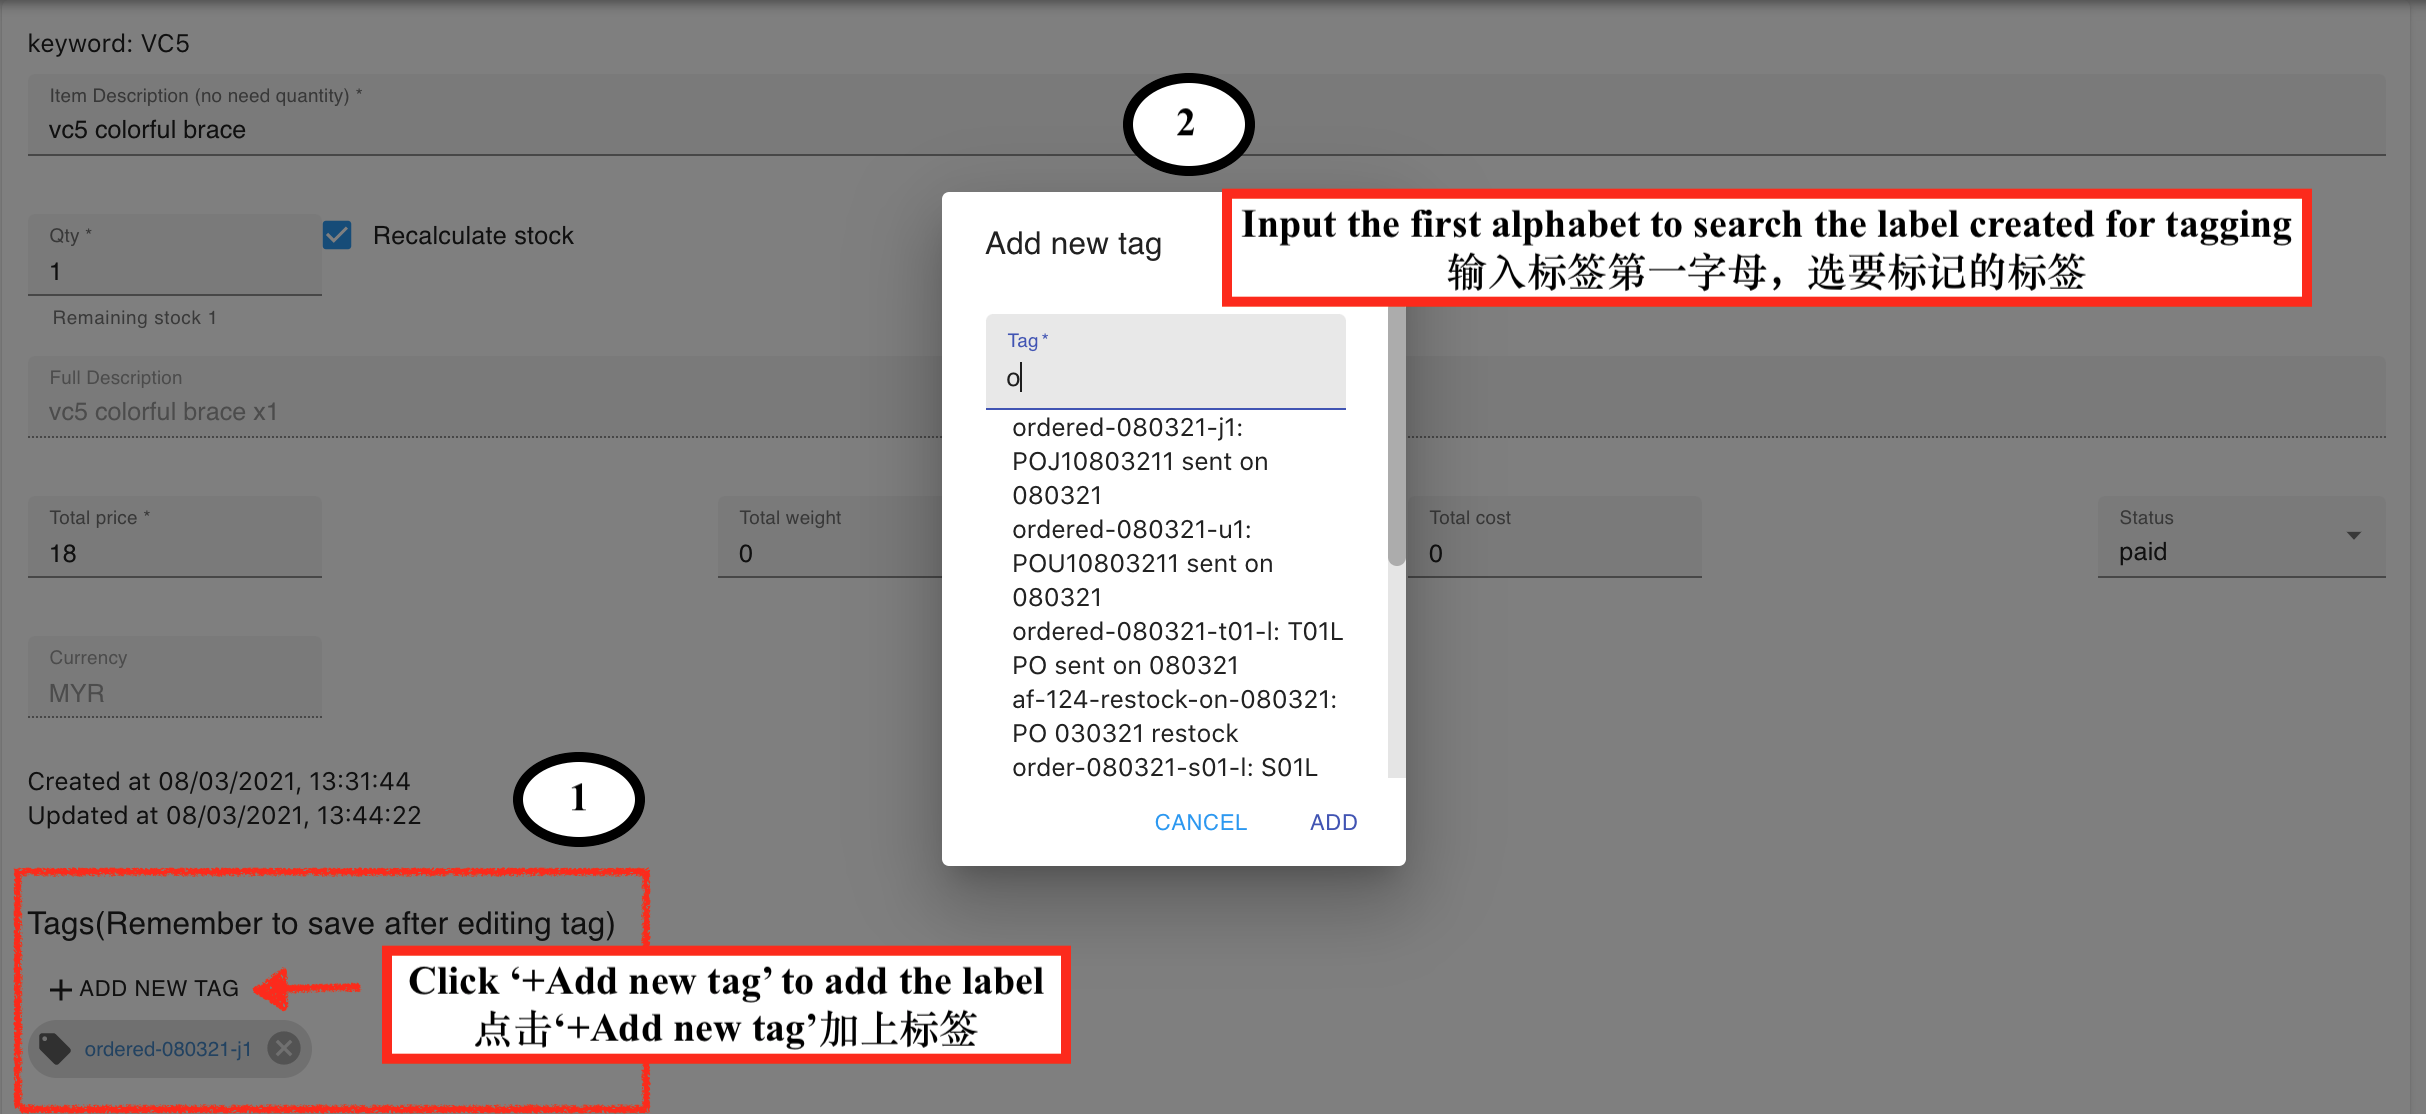
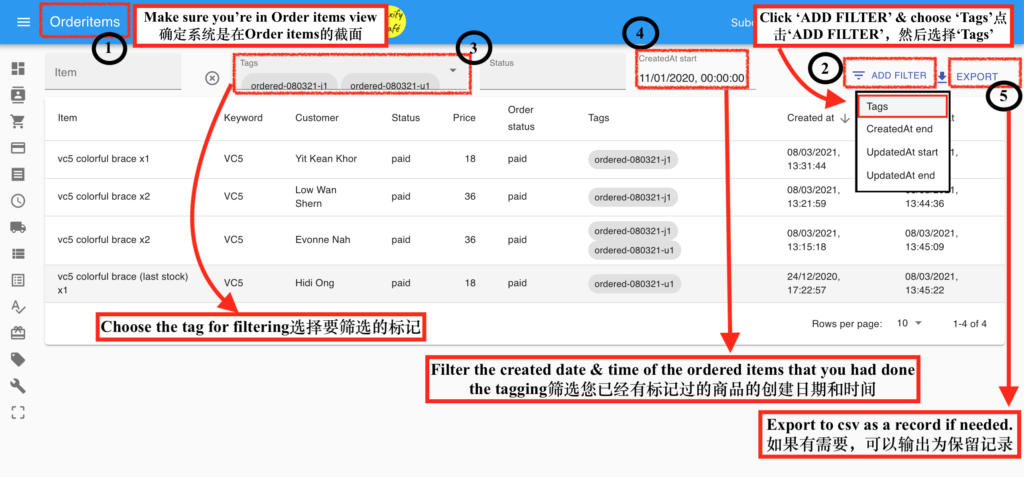
How do the filtering of the tag under ‘Order Items’?
Step 1: Go to ‘Order items‘ from the menu on the left.
Step 2: Click the button ‘ADD FILTER‘ and select ‘Tags‘.
Step 3: Select the tag label name that you want.
Step 4: Optional to add a filter for the item tag created time frame to narrow the search.
Step 5: You will see the screen show the item with the tag. Optional, you can export to CSV.
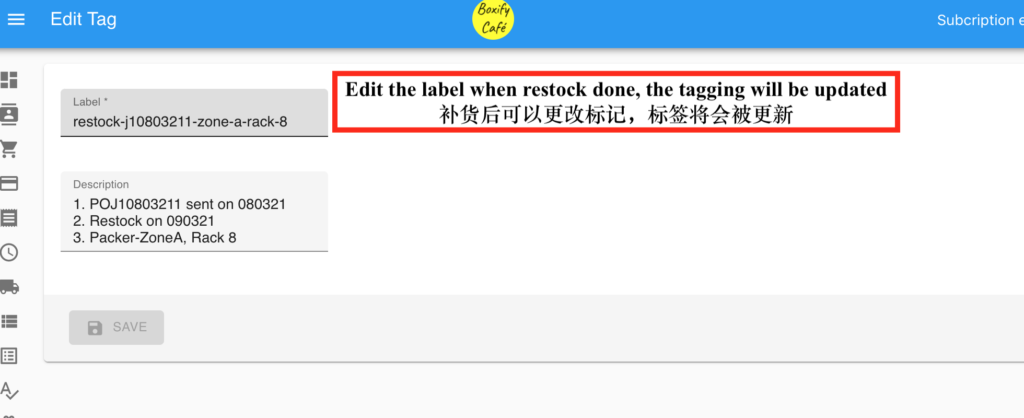
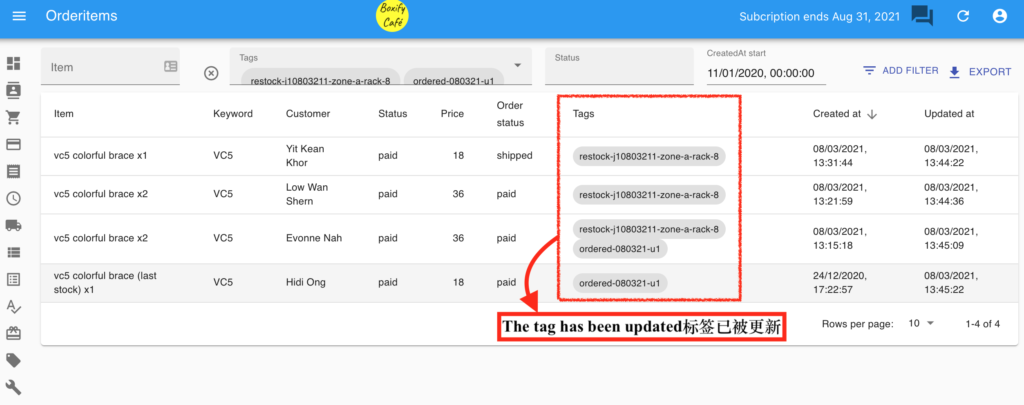
Rename the tag after restocking is done, the tagging will be updated accordingly
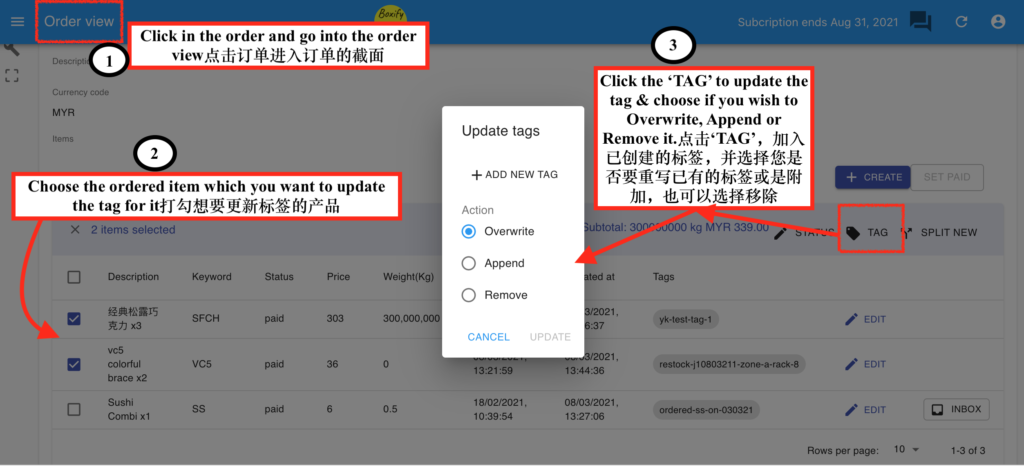
Overwrite, Append or Remove the tag in the order view
Step 1: Click on the order to the order view.
Step 2: Select the ordered item.
Step 3: Click on the ‘Tag‘ icon on the upper right. And, selection the action to update the tag.
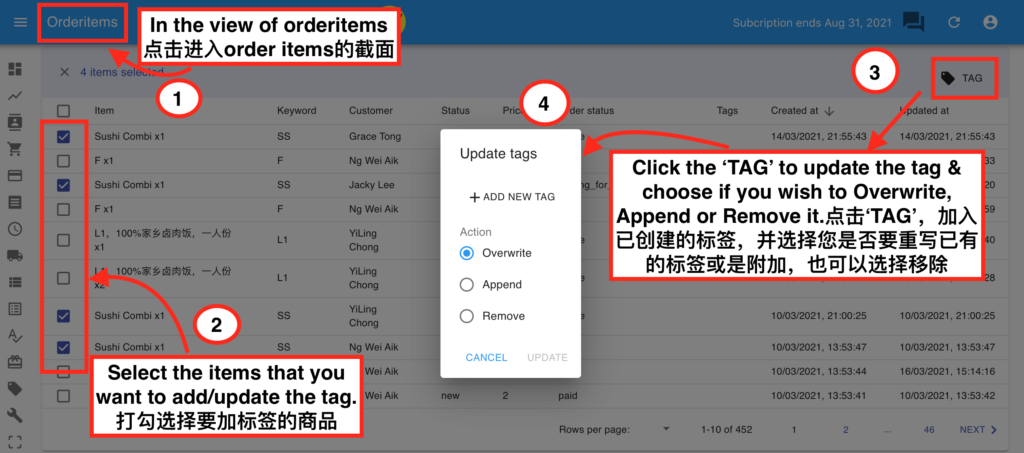
Bulk update the tag from the order items view
Step 1: Go to ‘Order items‘ from the menu on the left.
Step 2: Select the order items.
Step 3: Click on the ‘Tag‘ icon on the upper right.
Step 4: selection the action to update the tag.