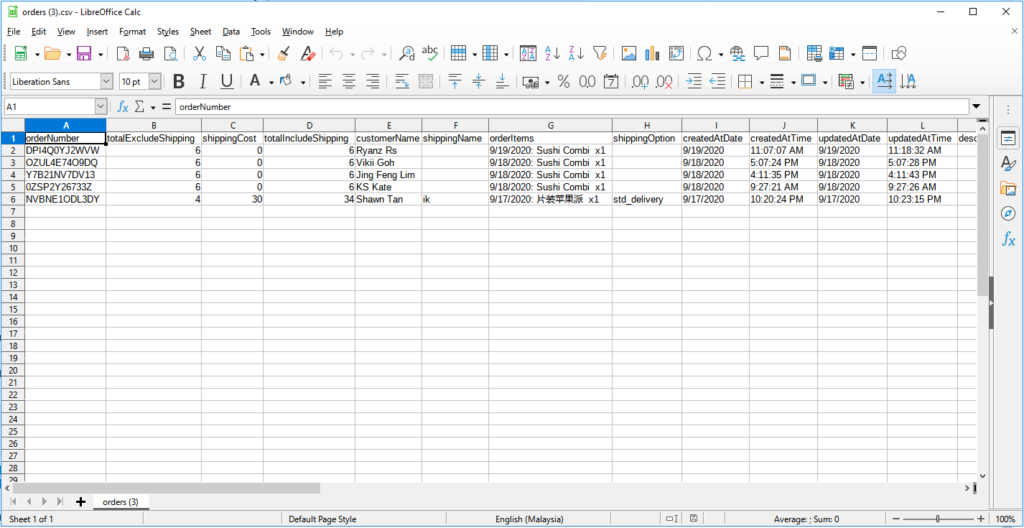
Work with Boxify Exports in Excel
Boxify exports your data as a CSV file that opens in Excel. This article shows you how to export order items, filter them, total your sales, and fix Chinese characters that appear garbled. For formulas that tidy up the exported data, see Excel Formulas for Boxify Exports.
Export order items and filter them
Section titled “Export order items and filter them”Use this to see only the orders you need — for example, items with the status “Shipped” or “Ready to Ship” within a specific date range.
- Go to Admin panel and click Order Items.
- Click Filter (or Add Filter) at the top of the page.
- Set Created from and Created to to the date range you want (both fields are optional).
- Click Export to download the file as a CSV file.
- Open the file in Excel and use the filter feature to show only the order status or items you need.
Calculate your total sales
Section titled “Calculate your total sales”Export your order items and let Excel add up your sales for any time period.
- Go to Admin panel and click Order Items.
- Click Add Filter in the top right corner.
- Set Created from and Created to to the date and time range you want.
- Click Export to download the data as a CSV file.
- Open the file in Excel and delete any rows showing the status Cancelled if you do not want those included in your total.
- Click on the Price column to select it.
- Read the SUM value shown at the bottom of the screen — that is your total sales figure.
Show Mandarin/Chinese characters
Section titled “Show Mandarin/Chinese characters”If Chinese characters appear as question marks or strange symbols when you open your Boxify export in Excel, the file encoding is not set correctly. Watch the video to fix it.
If Excel still cannot display Chinese text after following the video, use LibreOffice instead. It is a free alternative that handles Chinese characters without extra setup.
Download and set up LibreOffice
Section titled “Download and set up LibreOffice”If Microsoft Excel shows an error or cannot display Chinese characters in your Boxify export, use LibreOffice instead. LibreOffice is free and handles these files correctly.
-
Go to https://www.libreoffice.org/.
-
Click Download and choose Download LibreOffice.

-
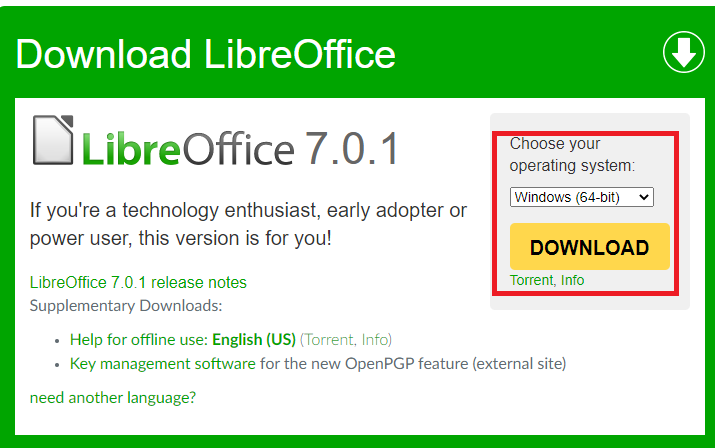
Choose your computer’s operating system and click the download button.
-
Run the installer file after it downloads.
-
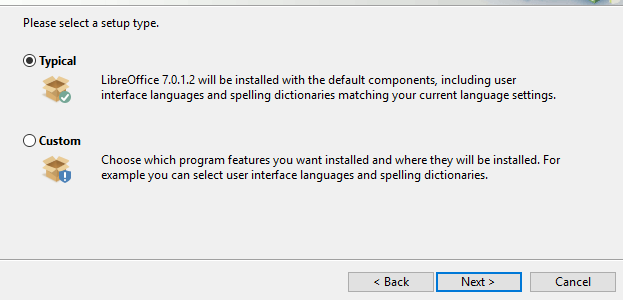
Select Typical when the installer asks which type of installation you want.
-
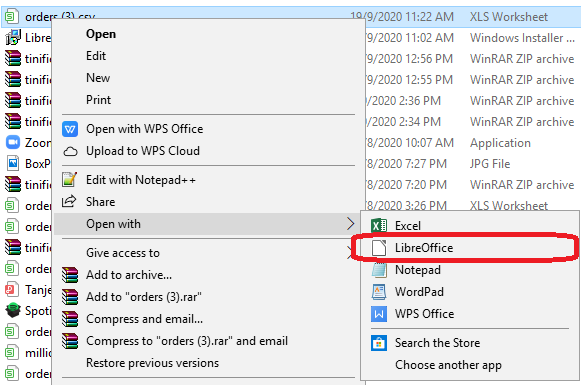
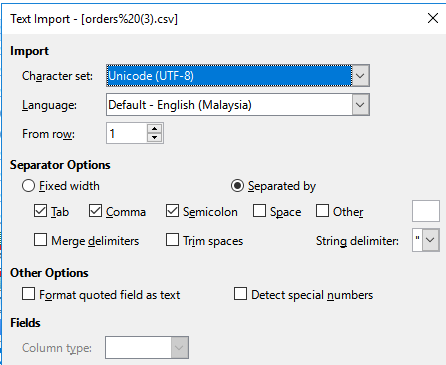
Right-click the file you downloaded from Boxify, then choose Open With › LibreOffice Calc.
-
Match the settings shown in the screenshot below when the import dialog appears.
-
Click OK to open the file.