How to Assign Variants, Selections & Categories to Products
Assigning a category and variants to each product ensures it appears in the right place in your webstore with the correct options for customers to choose from. A product with no category will not appear in the webstore.
Before you start
Section titled “Before you start”- Create variants before assigning them to products.
Assign to a single product
Section titled “Assign to a single product”- Go to Keywords.
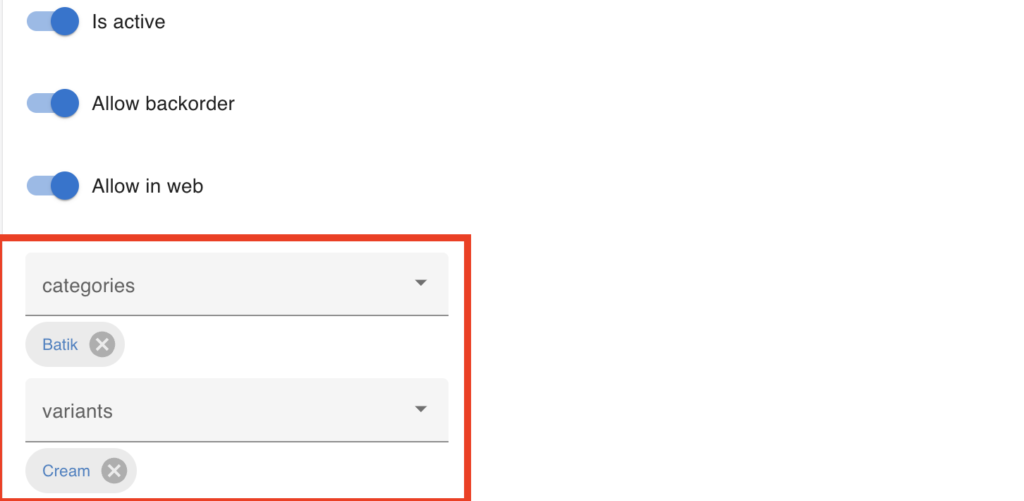
- Click the product and choose Edit.
- Scroll to Category and choose the category this product belongs to (for example, “T-Shirts”).
- Scroll to Variants and tick all the options that apply (for example, “Red”, “Size L”).
- Click Save.
Assign to multiple products at once
Section titled “Assign to multiple products at once”- Go to Keywords.
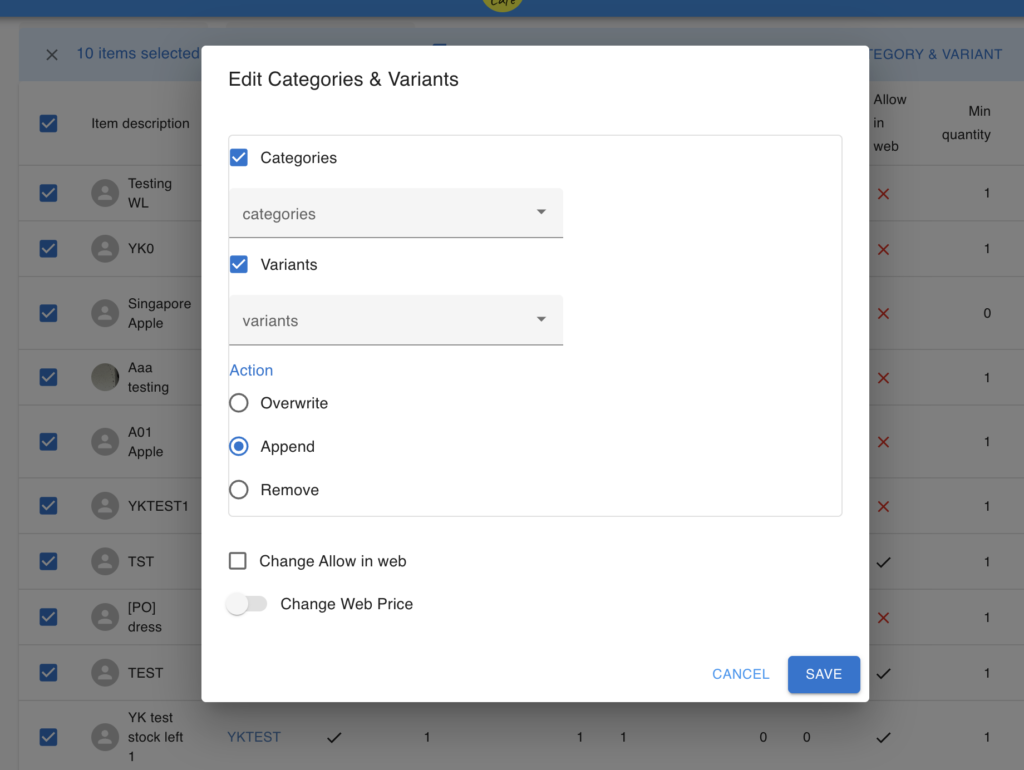
- Select the products you want to update.
- Click Edit Categories & Variants.
- Tick the box for Category and choose the category to apply to all selected products.
- Tick the box for Variants and choose the variants to add to all selected products.
- Click Save.
Variant actions at a glance
Section titled “Variant actions at a glance”| Action | What it does |
|---|---|
| Add | Creates a new variant value (for example, “Red” or “Size L”) |
| Rewrite | Edits the name or description of an existing variant |
| Append | Assigns an existing variant to a product |
| Remove | Unlinks a variant from a product — the variant stays in the system |