
How to Log In to Boxify with Facebook
Boxify uses Facebook to log in. There are two login options. Always try the normal Facebook login first — if that does not work, fall back to Facebook Business login.
Before you start
Section titled “Before you start”🧩 Quick analogy: A Business Portfolio is like a company. A Facebook Page is an asset owned by that company — like a shoplot the company owns. To let Boxify manage the shoplot, you need full access to the company (the Business Portfolio) so you can grant that access.
- Your Facebook Page must be inside a Business Portfolio (Meta Business Manager).
- You must have Admin access to both the Page and the Business Portfolio.
- If you have not set this up yet, see Check Your Facebook Business Setup first.
Check that you have full access
Section titled “Check that you have full access”Most login problems come down to not having full access to the Business Portfolio. Check it before you start.
-
Go to business.facebook.com.
-
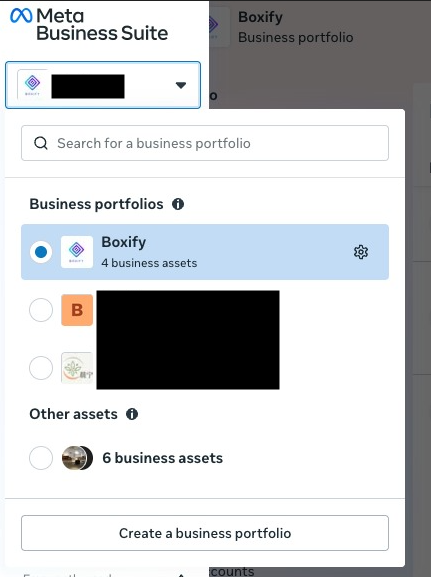
Open the portfolio switcher in the top left and select the Business Portfolio that owns your Page.
-
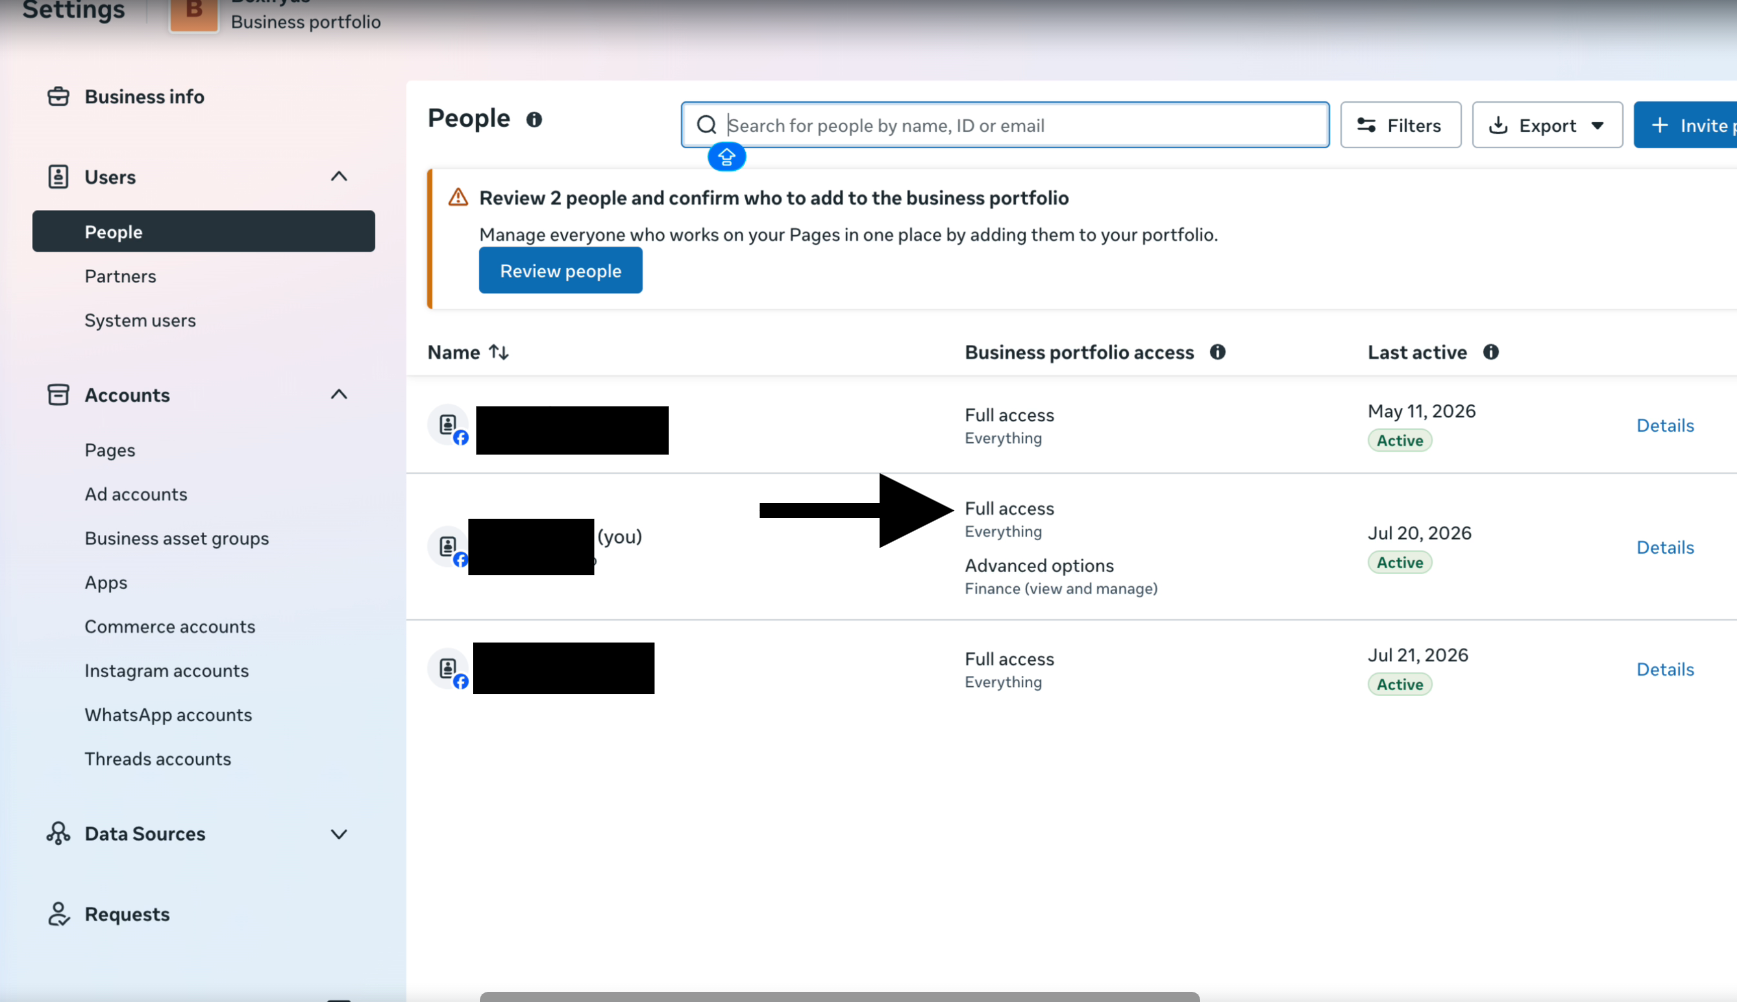
Go to Settings › Users › People.
-
Find your own row — it is marked (you) — and check the Business portfolio access column. It must say Full access / Everything.
Step 1: Try normal Facebook login
Section titled “Step 1: Try normal Facebook login”-
Open the Boxify login page: https://fb-live-admin.boxify.io/#/login
-
Tap Login with Facebook and log in with your Facebook account.
-
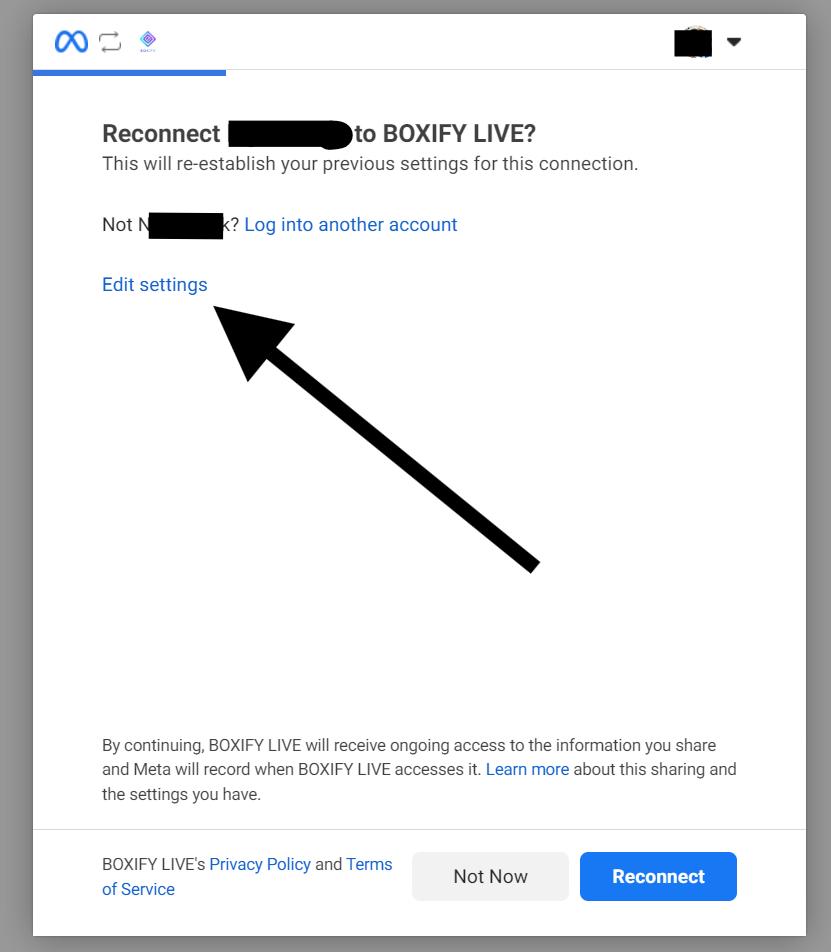
On the Meta permission screen, tap Edit settings.
-
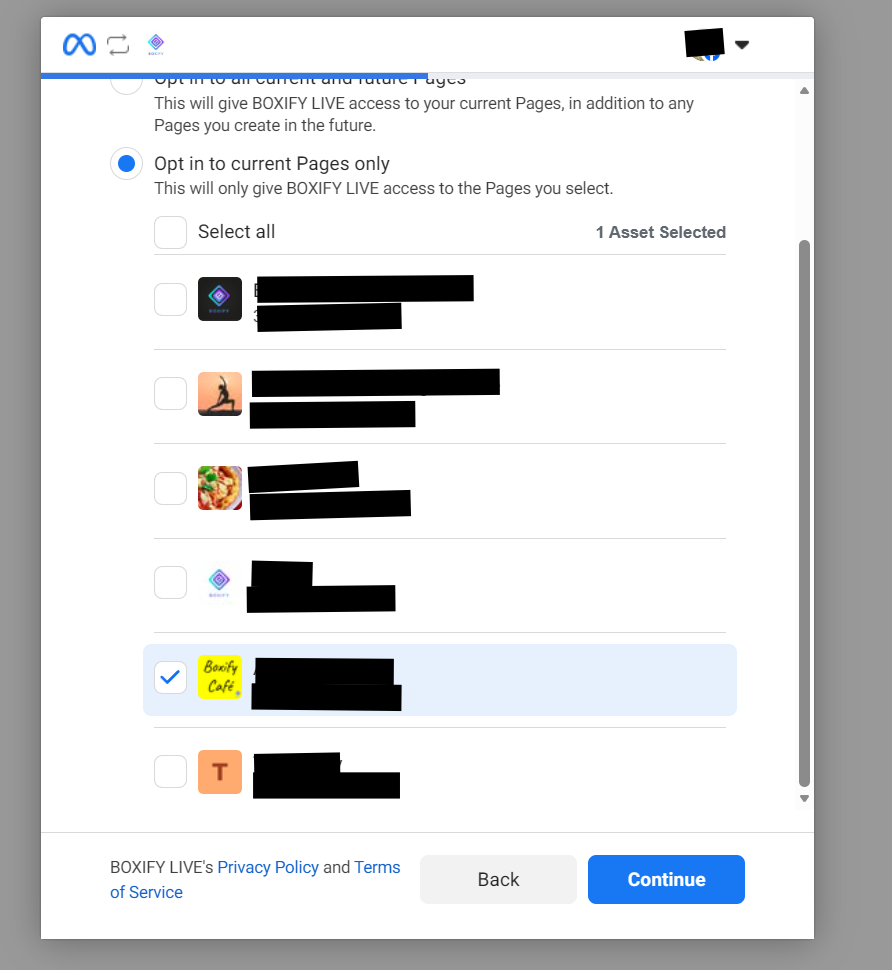
Choose Opt in to current Pages only, tick the Page you want to sell from, then tap Continue.
-
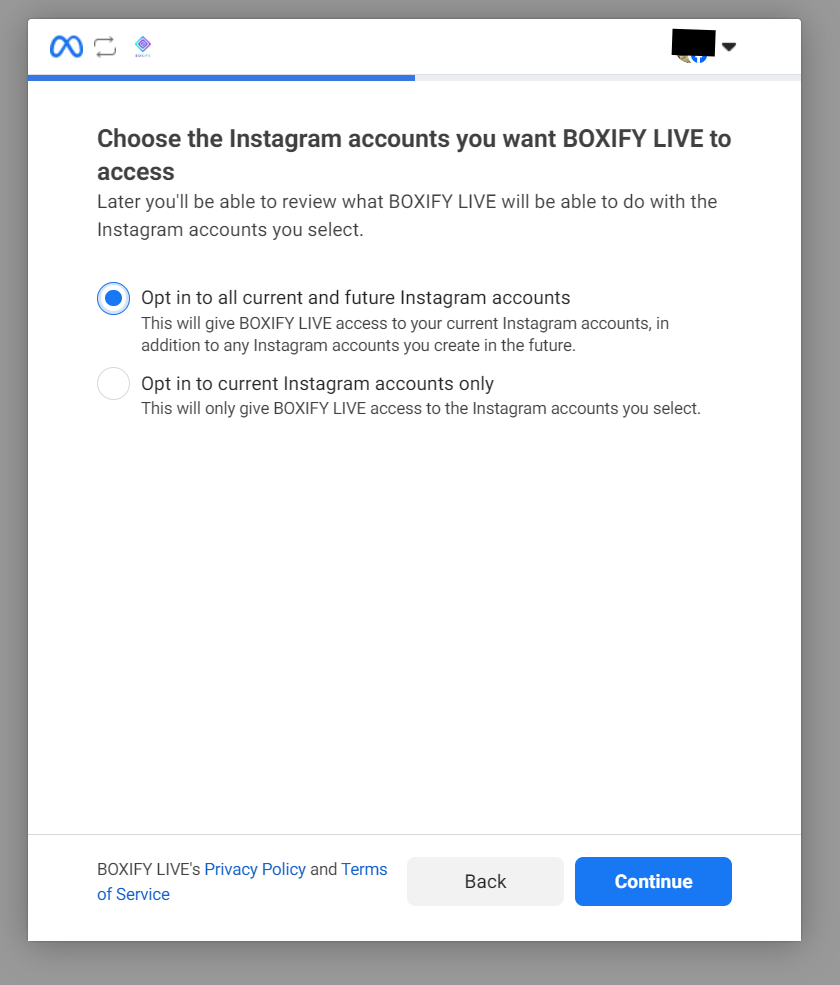
Instagram is optional. If you do not have an Instagram account, just select Opt in to all current and future Instagram accounts, then tap Continue.
-
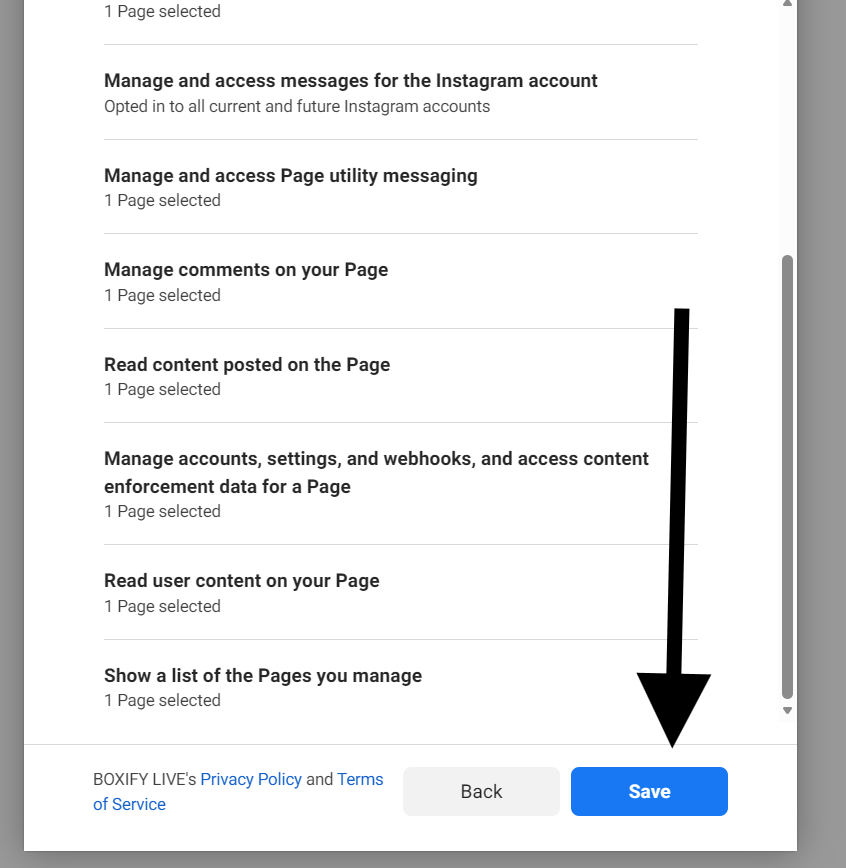
Review every permission on the list — leave them all enabled — then tap Save.
-
Back in Boxify, select your Facebook Page from the Select a page dropdown and tap CONNECT PAGE.
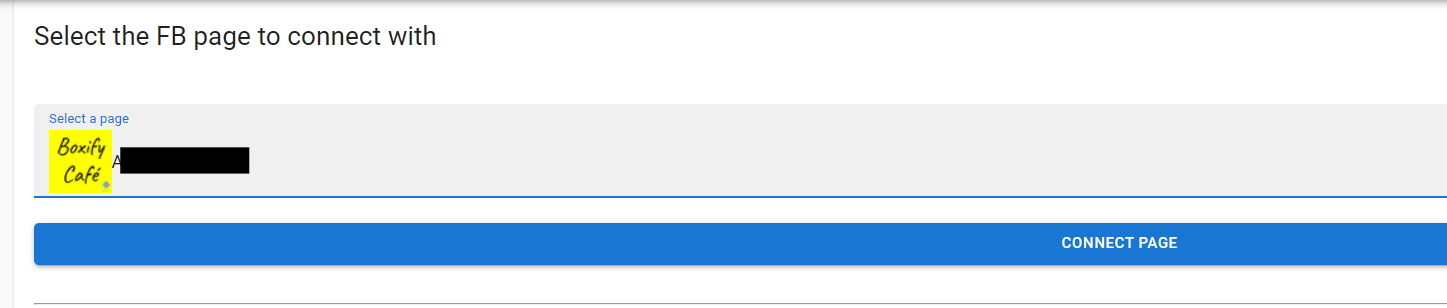
If your Page appears and connects successfully, you are done. ✅
Step 2: If that does not work, use Facebook Business login
Section titled “Step 2: If that does not work, use Facebook Business login”Use this if the normal login shows no Pages, is missing your Page, or throws an error.
-
Go back to the Boxify login page: https://fb-live-admin.boxify.io/#/login
-
Tap Login with Facebook for Business.
-
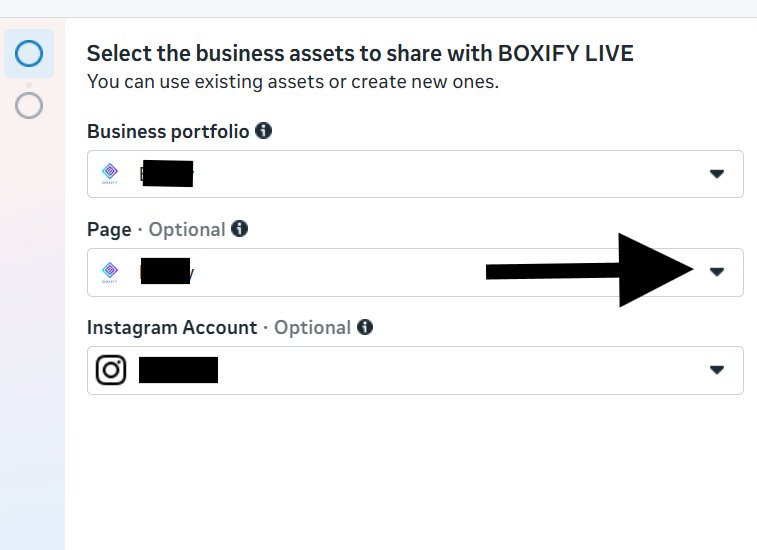
On the Select the business assets to share with BOXIFY LIVE screen, open the Page dropdown and pick your Page. Instagram is optional.
-
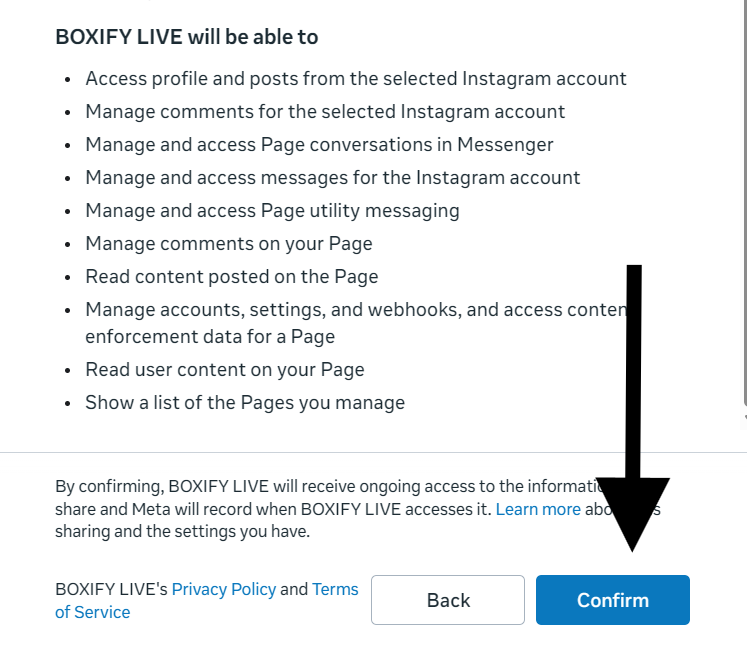
Review everything Boxify will be able to do, then tap Confirm.
-
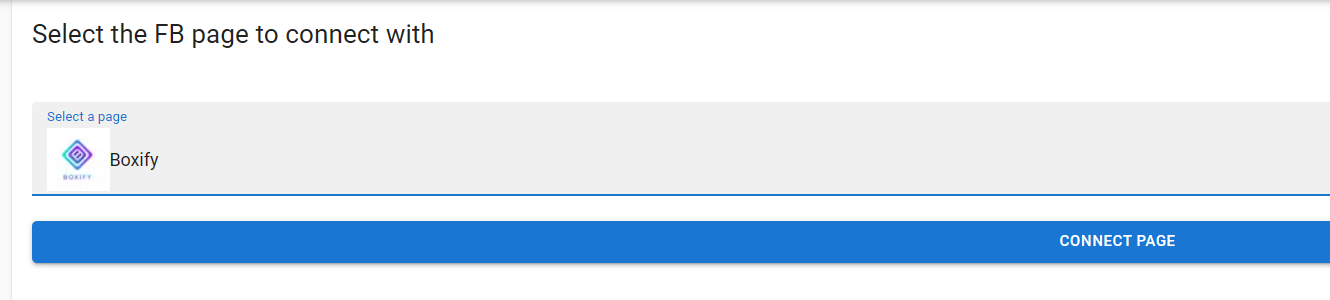
Back in Boxify, select your Facebook Page from the Select a page dropdown and tap CONNECT PAGE.
Still cannot log in?
Section titled “Still cannot log in?”- Make sure you are an Admin of the Page and the Business Portfolio.
- Confirm the Page is inside a Business Portfolio — see Check Your Facebook Business Setup.
- If Facebook blocks or limits your account, see Troubleshooting: Connecting Boxify.
See also: