DHL Express Malaysia
Link your DHL account to Boxify so you can create shipments, print labels, and schedule pickups.
Before you start
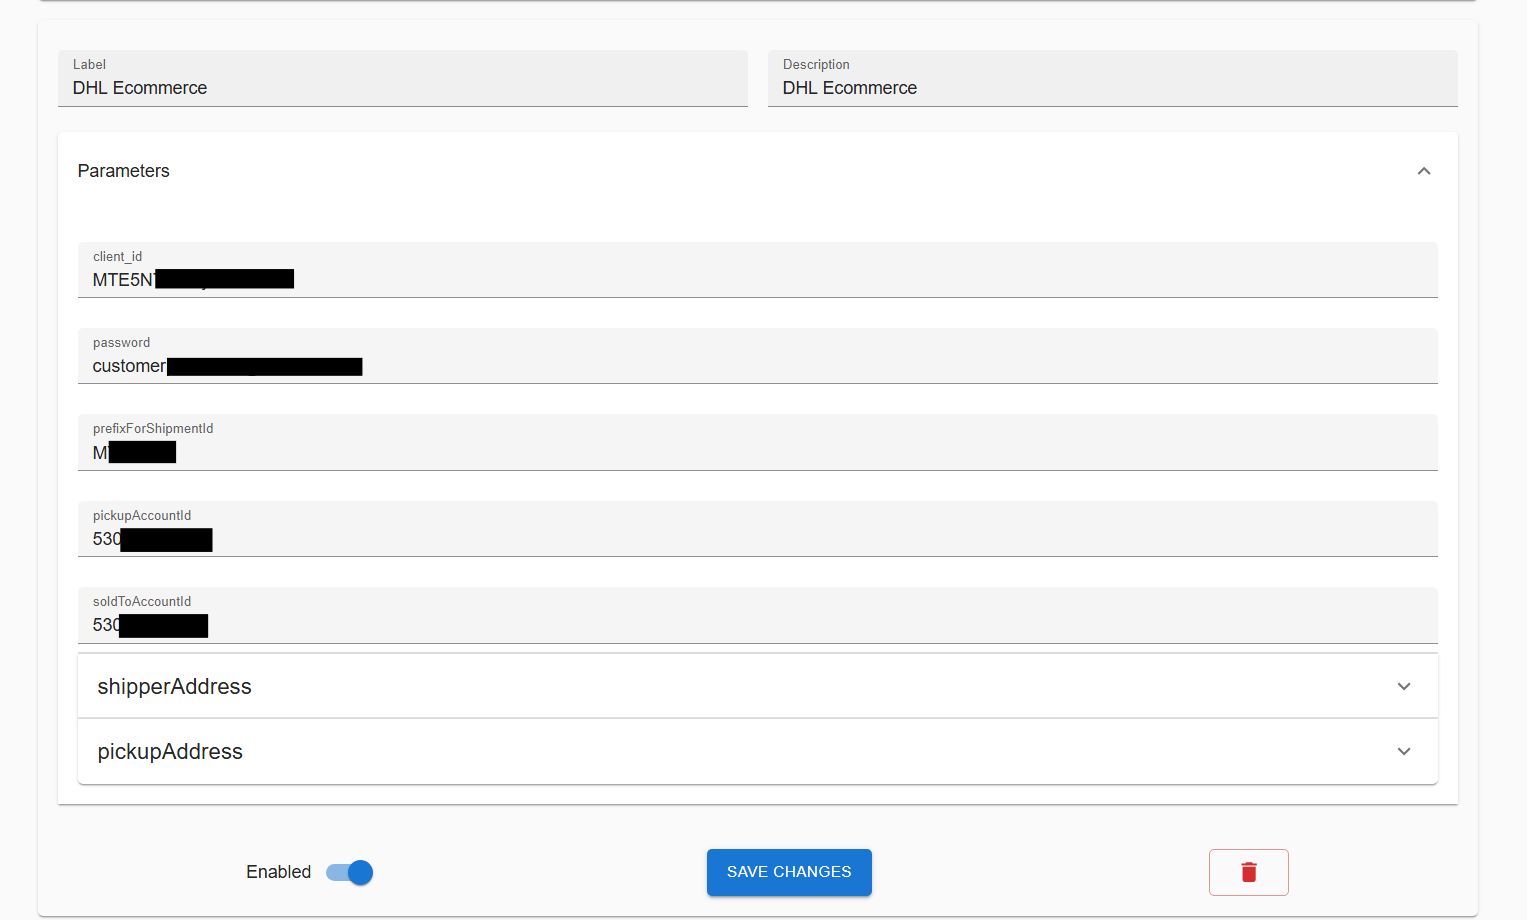
Section titled “Before you start”Get the following credentials from your DHL account manager before you begin:
- client_id
- password
- prefix
- pickupAccountId
- soldToAccountId
Set up the shipping profile
Section titled “Set up the shipping profile”- Go to the Boxify Admin Panel and log in.
- Click your profile icon in the top right, then select Profile › Settings.
- Scroll down to Shipping Profiles and click Create New Profile.
- Select DHL as the shipping provider.
- Fill in the credentials from your DHL account manager: Client ID, Password, Prefix, Pickup Account ID, and Sold To Account ID.
- Enter your Shipper Address and Pickup Address.
- Check all details for accuracy, then click Save.
Create shipments (Add AWBs)
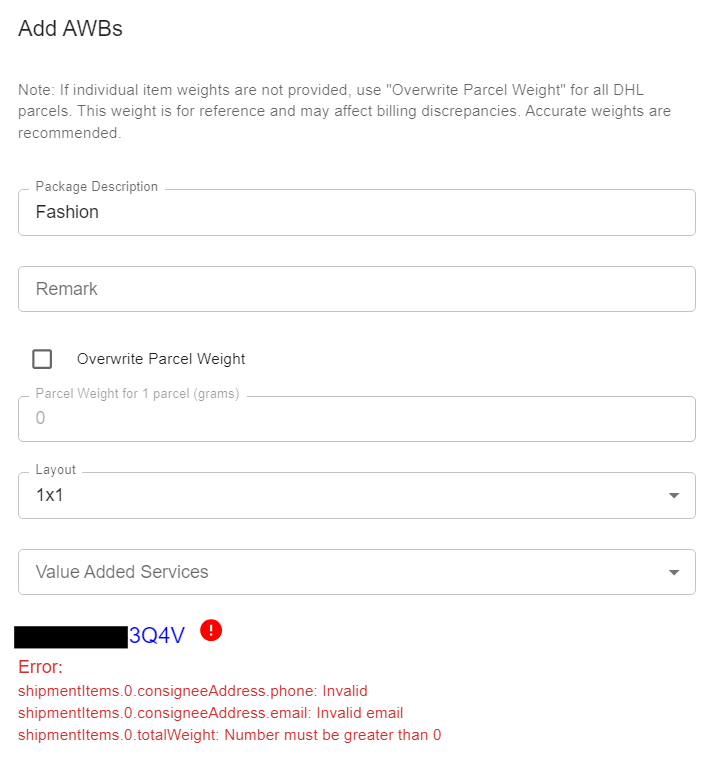
Section titled “Create shipments (Add AWBs)”An airwaybill (AWB) is the shipping label attached to your parcel.
- Go to the DHL Shipping Panel.
- Upload the orders that need DHL shipping labels.
- Fix any errors — for example, missing addresses — before continuing.
Print AWBs
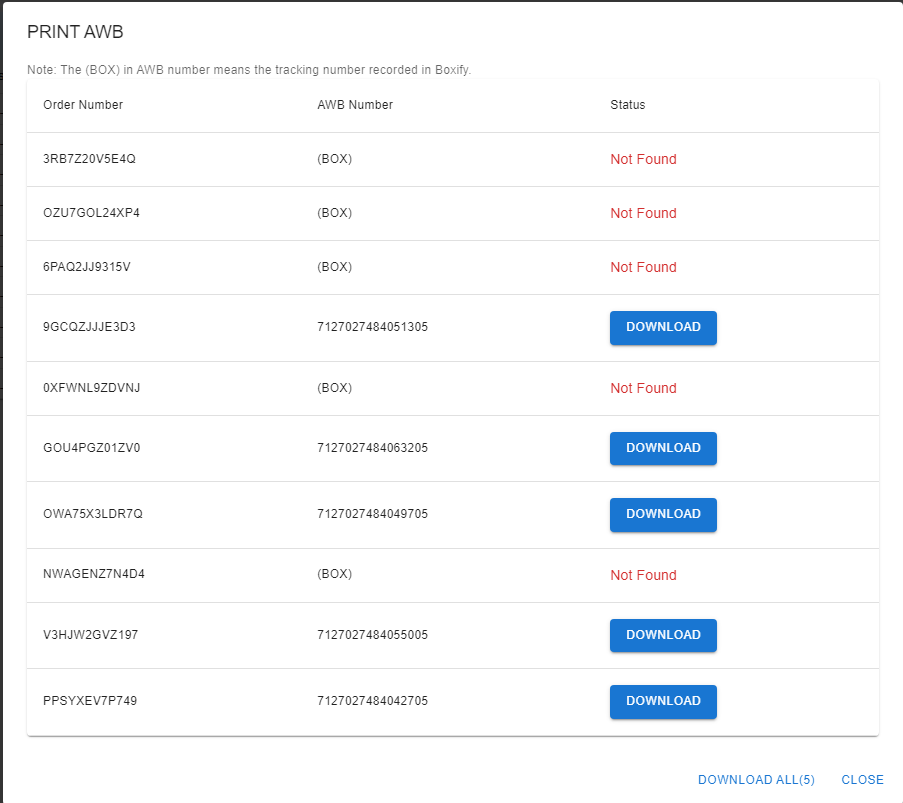
Section titled “Print AWBs”- Select the orders you want to print labels for.
- Click Print AWB.
- Boxify downloads a zipped folder containing the AWB PDFs.
- Click Download All to download multiple zipped folders at once.
- Extract the files using 7-Zip, or go to the DHL Portal to export them directly.
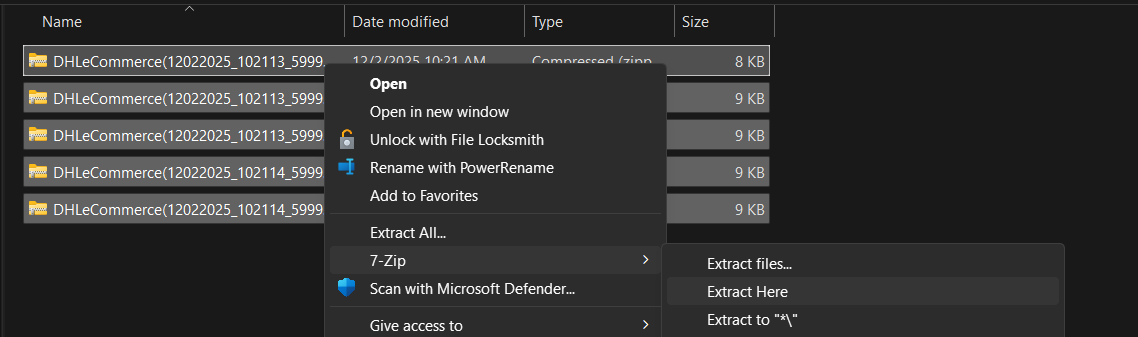
Extract multiple zipped files with 7-Zip
Section titled “Extract multiple zipped files with 7-Zip”- Select all the zipped folders.
- Right-click and choose 7-Zip › Extract Here.
- Select the extracted PDFs and print them.
Schedule a pickup
Section titled “Schedule a pickup”- Go to Pickups in Boxify.
- Schedule a pickup time and confirm the correct pickup address.
- DHL will collect the packages from your location.
View pickup history
Section titled “View pickup history”- Open the Pickup History panel to review past pickups.
- To cancel a pickup, contact DHL directly — cancellations cannot be done through Boxify.