Order Item Tags
Order item tags let you attach internal labels to individual order items. Tags are only visible to your team — customers do not see them.
Examples of how to use tags:
- Tag an item with a purchase order (PO) number to track restocks.
- Tag an item with a warehouse name to show which location will fulfil it.
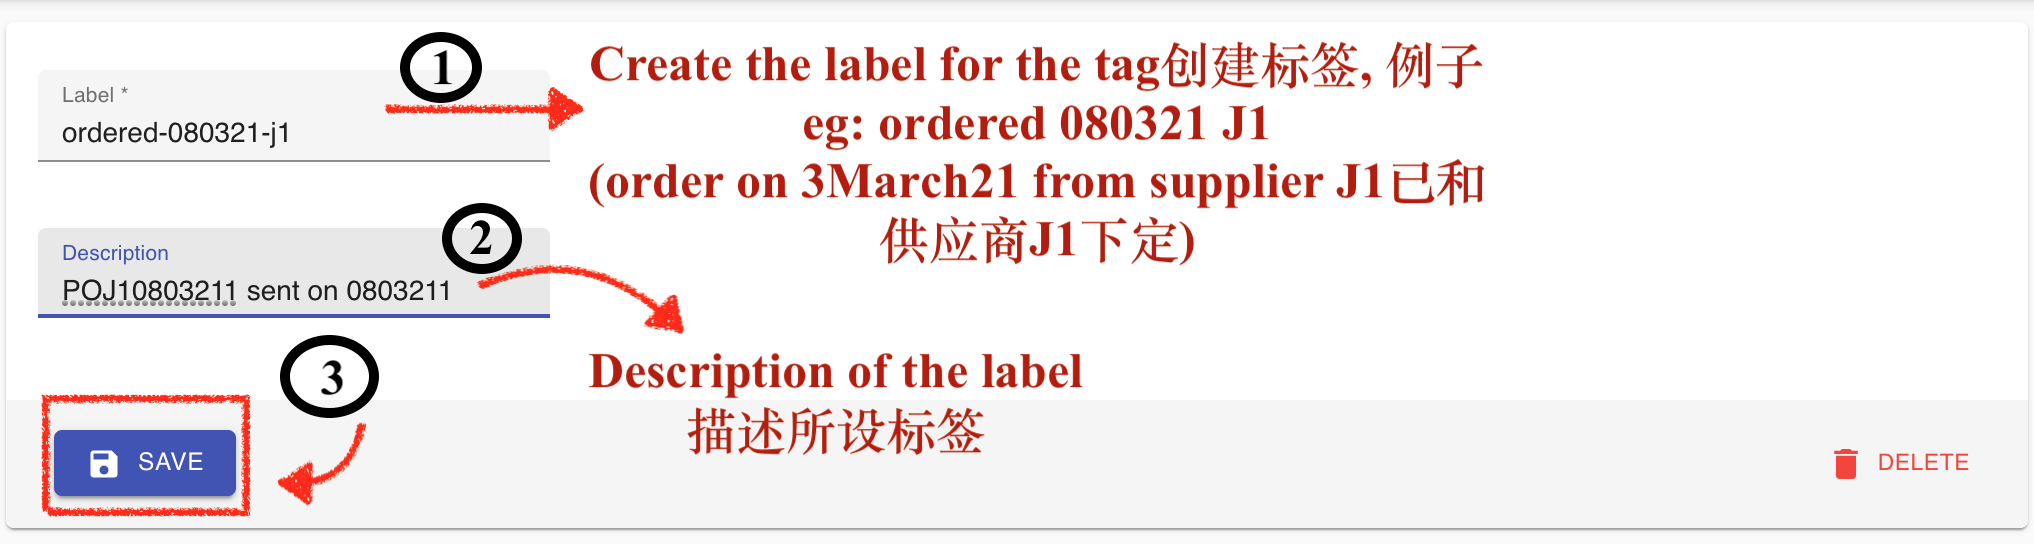
Create a tag
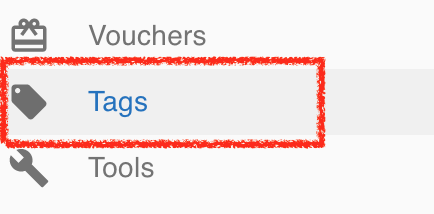
Section titled “Create a tag”- Click Tag in the left menu.
- Create a label for the tag.
Apply a tag to an order item
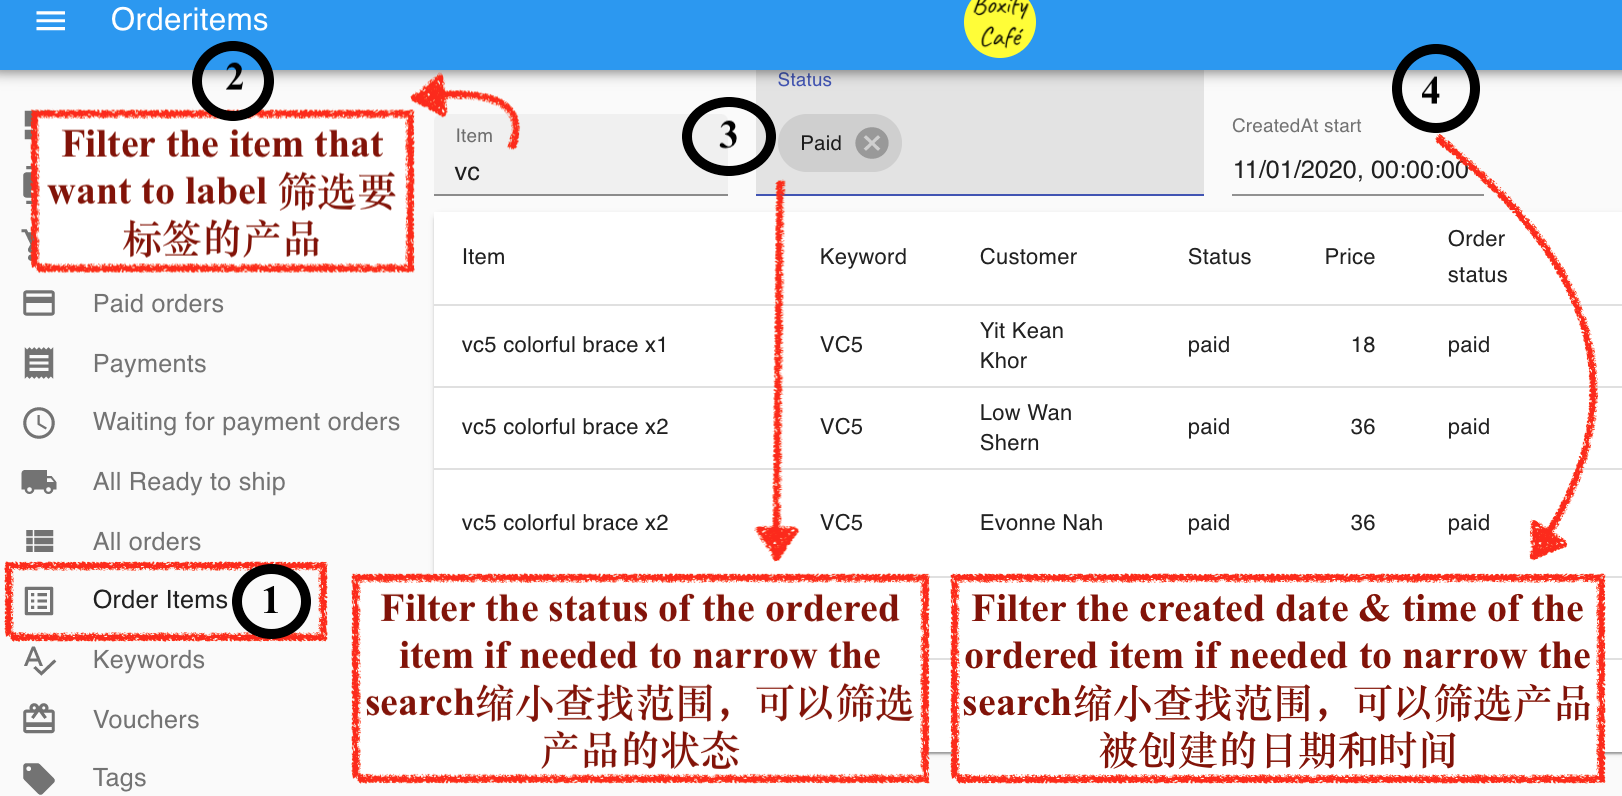
Section titled “Apply a tag to an order item”- Click Order Items in the left menu and filter to find the items you want to tag.
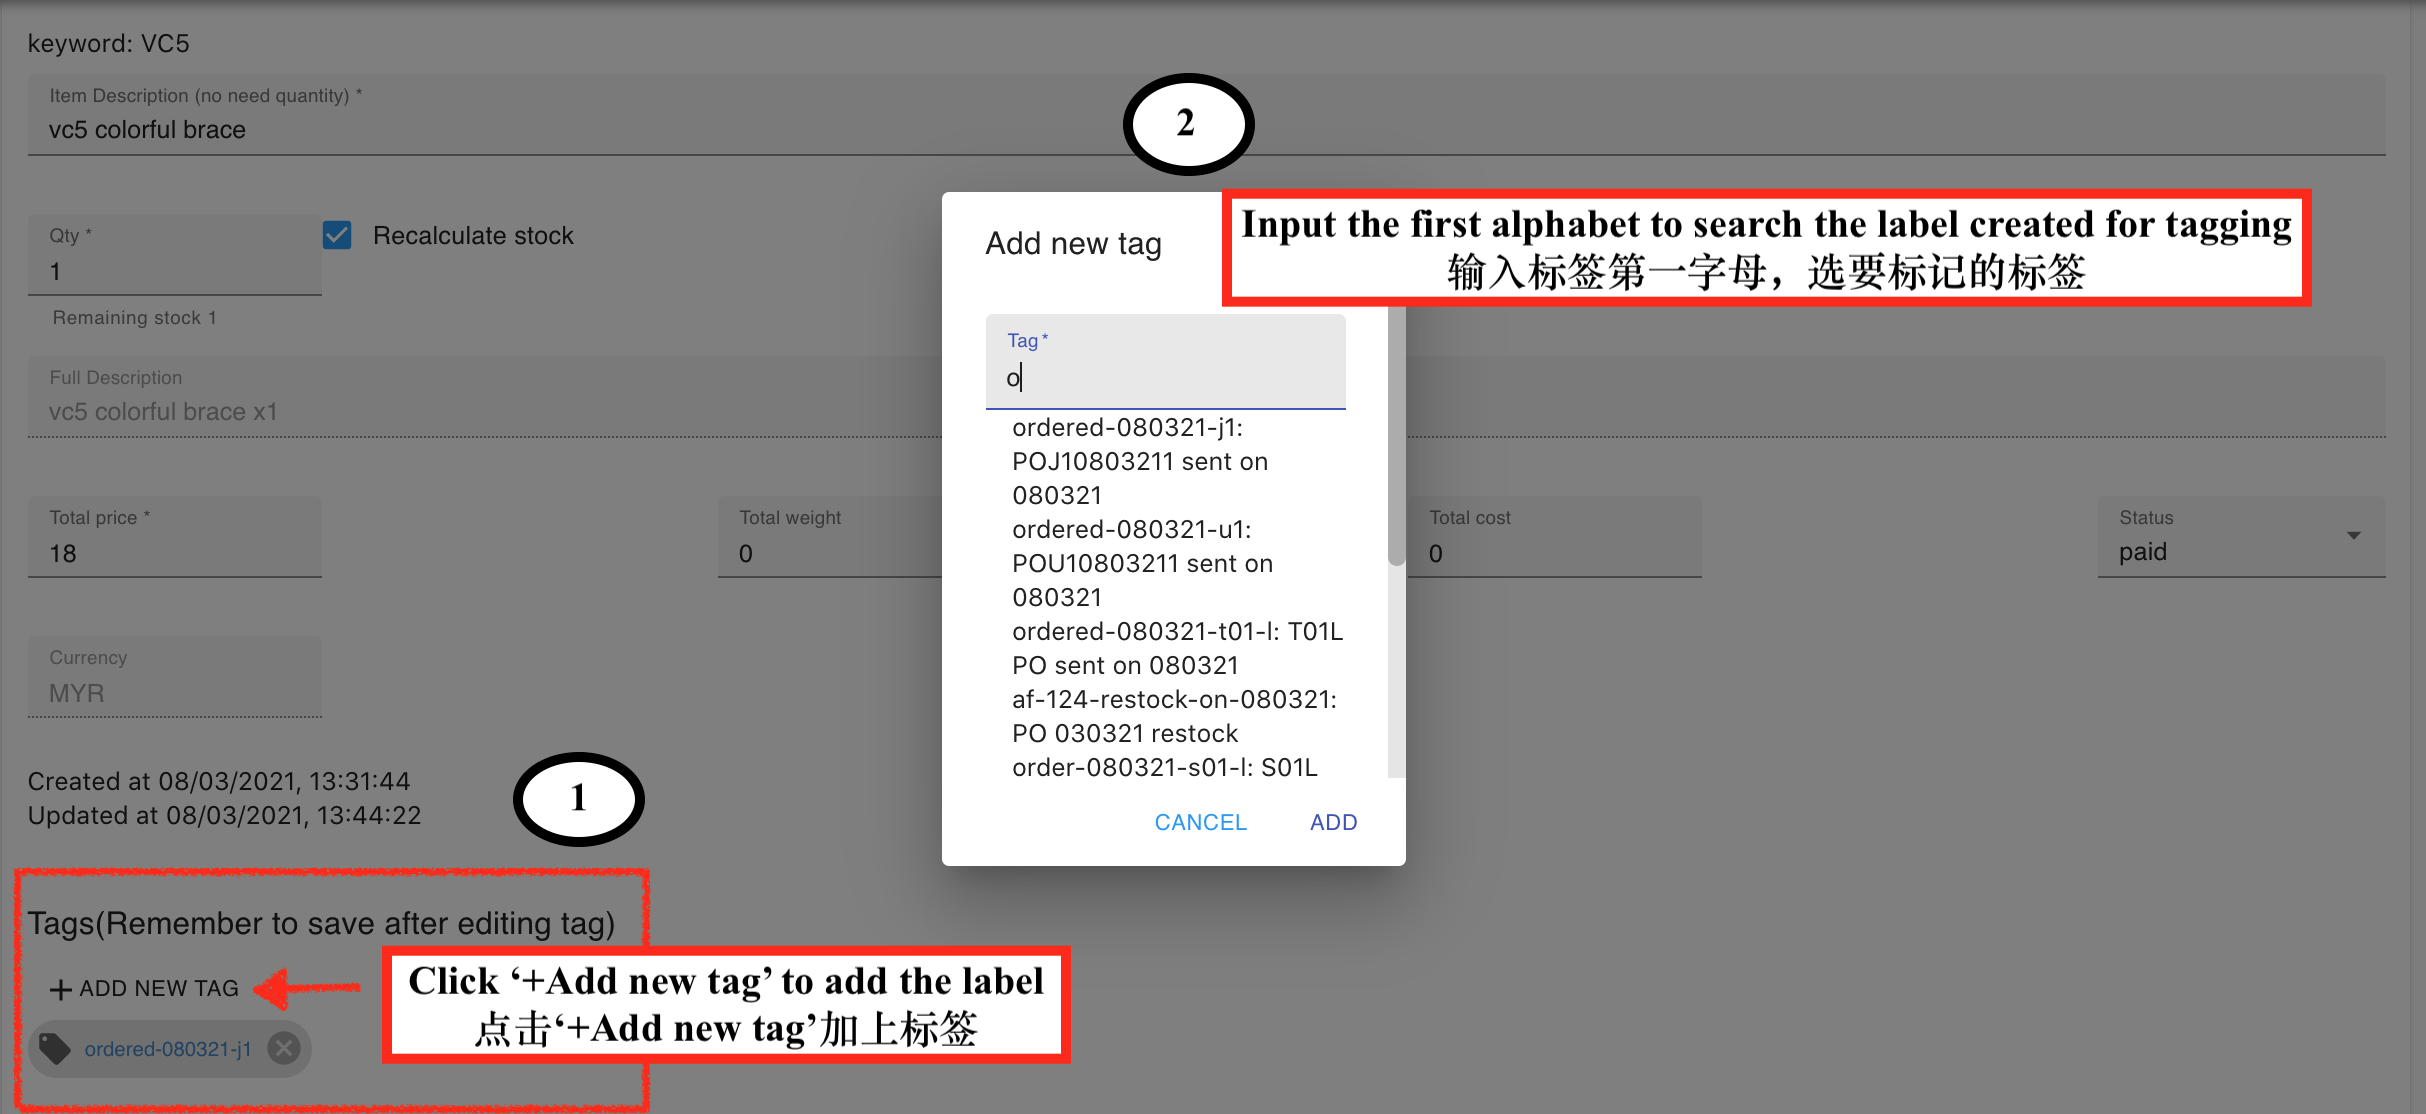
- Click the order item to open it and add the tag.
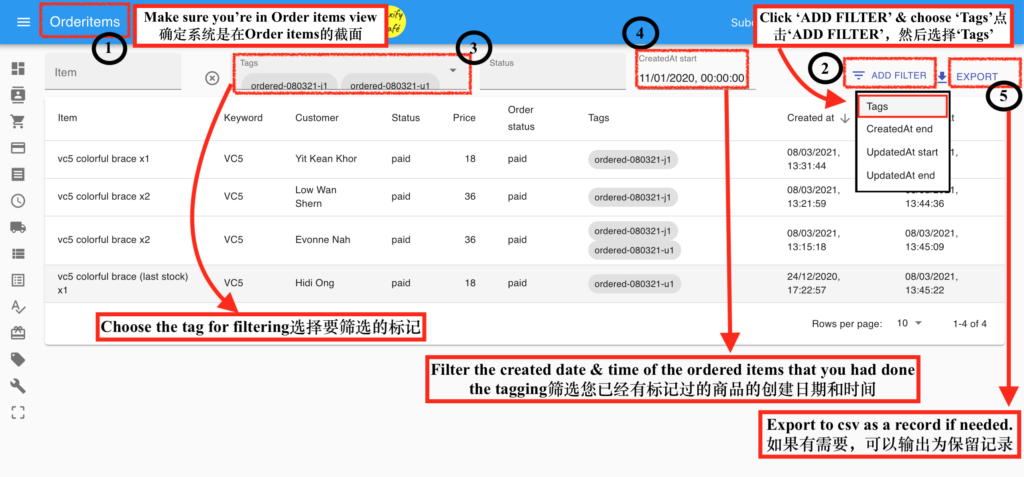
Filter order items by tag
Section titled “Filter order items by tag”- Go to Order Items in the left menu.
- Click ADD FILTER and select Tags.
- Select the tag label you want to filter by.
- Optionally, add a date range filter to narrow the results further.
- The list will show all items with that tag. You can export the results to CSV if needed.
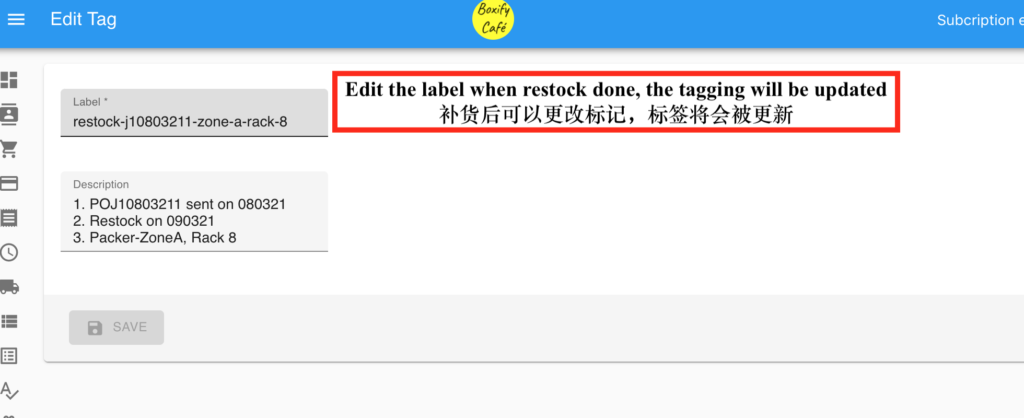
Rename a tag
Section titled “Rename a tag”When you rename a tag, all items already labelled with that tag are updated automatically.
Go to Menu › Tag › click the tag and edit the label.
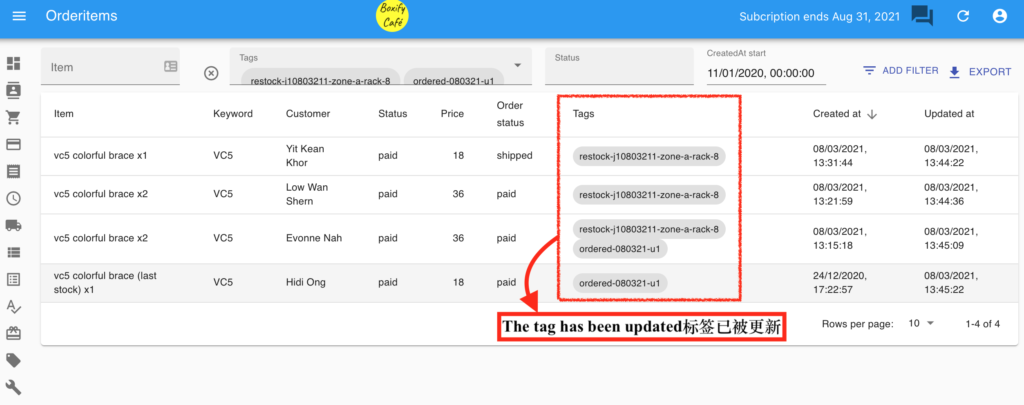
Order Items view — the tag label updates across all items.
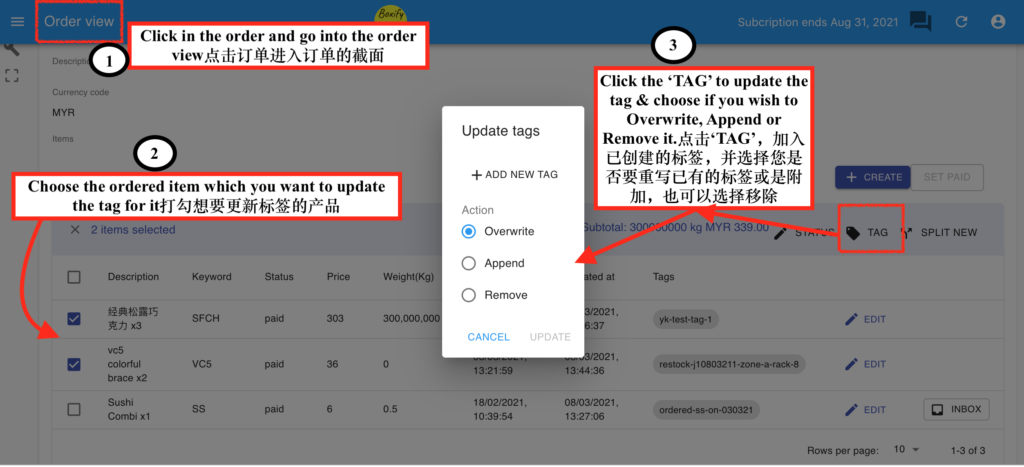
Update a tag from the order view
Section titled “Update a tag from the order view”- Open the order.
- Select the order item.
- Click the Tag icon in the top right and choose whether to overwrite, append, or remove the tag.
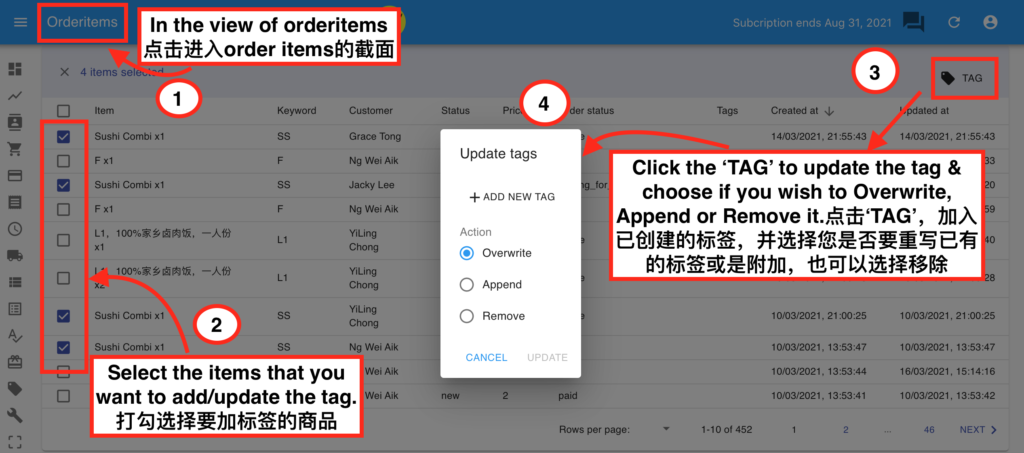
Bulk update tags from the Order Items view
Section titled “Bulk update tags from the Order Items view”- Go to Order Items in the left menu.
- Select the items you want to update.
- Click the Tag icon in the top right.
- Choose the action: overwrite, append, or remove.
See also: