How to Change DNS on Windows to 1.1.1.1
Switching your DNS (Domain Name System — the service that translates website names into addresses) to Cloudflare’s 1.1.1.1 can improve your browsing speed and security.
Before you start
Section titled “Before you start”- You need a Windows 10 or Windows 11 computer.
- You need administrator access on that computer.
Method 1: Change DNS via Control Panel
Section titled “Method 1: Change DNS via Control Panel”- Press
Windows + Rto open the Run dialog. - Type
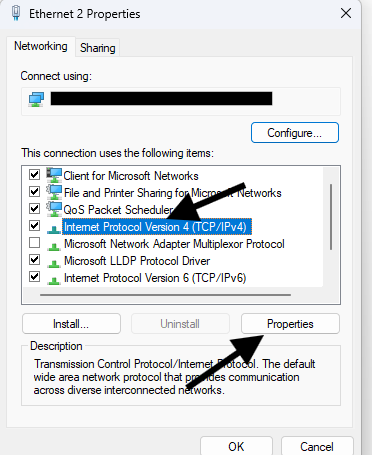
ncpa.cpland pressEnterto open Network Connections. - Right-click your active network connection (Wi-Fi or Ethernet) and select Properties.

- In the Networking tab, select Internet Protocol Version 4 (TCP/IPv4), then click Properties.
- Select Use the following DNS server addresses.
- Enter
1.1.1.1as the Preferred DNS server and1.0.0.1as the Alternate DNS server.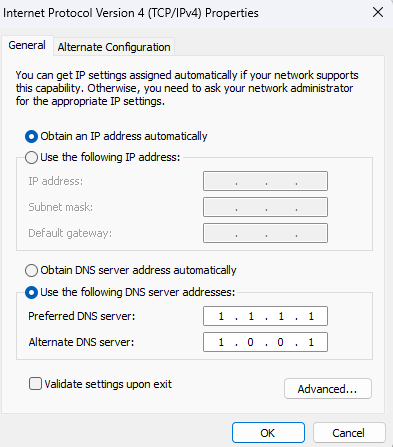
- Click OK, then close all open windows.
- Restart your computer for the changes to take effect.
Method 2: Change DNS via Windows Settings (Windows 10/11)
Section titled “Method 2: Change DNS via Windows Settings (Windows 10/11)”- Press
Windows + Ito open Settings. - Go to Network & Internet, then select Status.
- Click Change adapter options under Advanced network settings.
- Right-click your active network connection and select Properties.
- Select Internet Protocol Version 4 (TCP/IPv4), then click Properties.
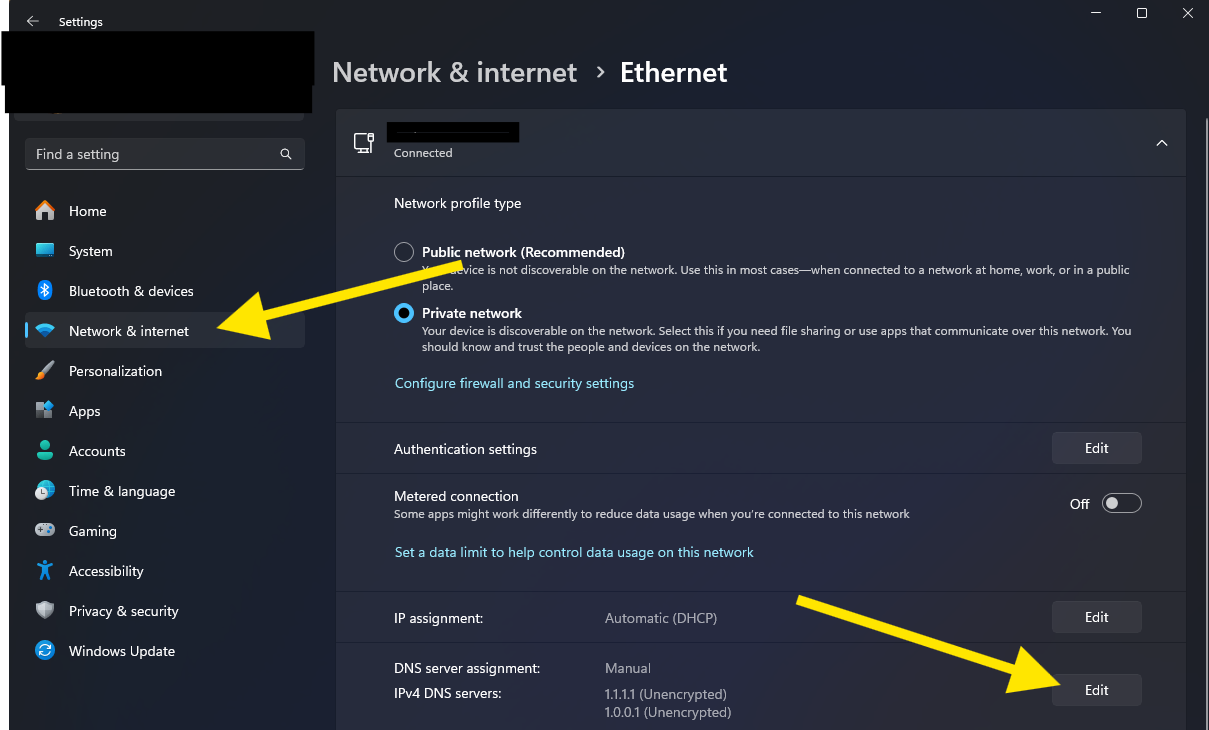
- Select Use the following DNS server addresses and enter
1.1.1.1as the Preferred DNS server and1.0.0.1as the Alternate DNS server.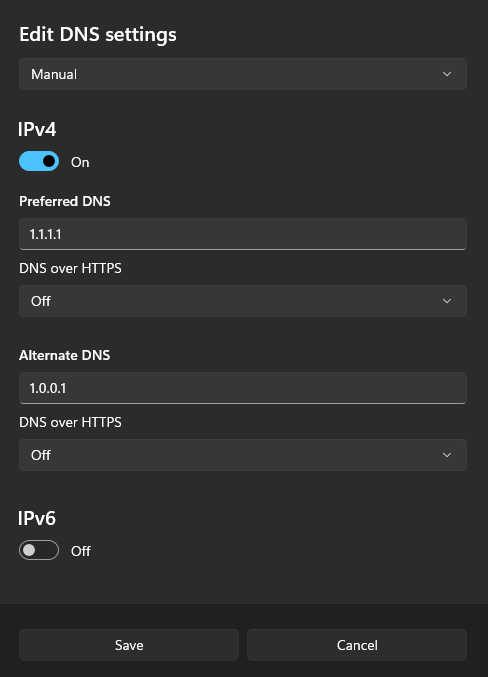
- Click OK, then close all open windows.
- Restart your computer for the changes to take effect.
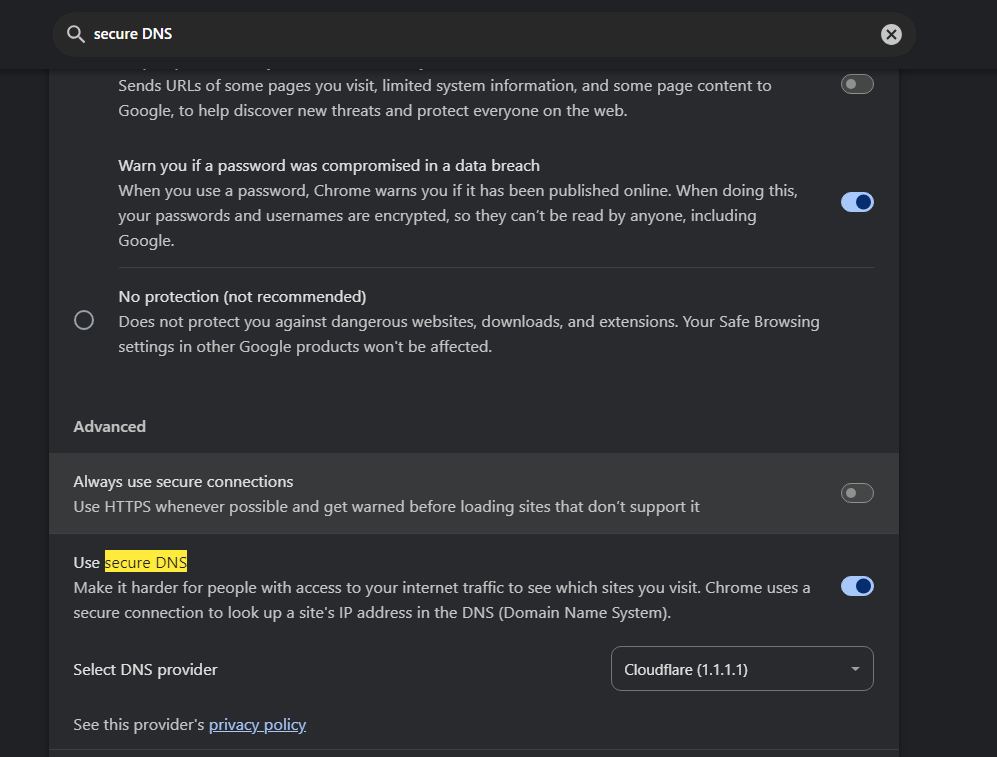
Method 3: Use Secure DNS in Chrome
Section titled “Method 3: Use Secure DNS in Chrome”- Open Google Chrome.
- Click the three-dot menu in the top-right corner and select Settings.
- Click Privacy and security in the left menu.
- Click Security.
- Scroll to Use secure DNS and turn it on.
- Select With from the dropdown and choose Cloudflare (1.1.1.1) from the list.
- Close the Settings tab.
If something goes wrong
Section titled “If something goes wrong”Verify the change worked
Section titled “Verify the change worked”- Open your browser and go to DNS Leak Test.
- Click Standard test.
- Wait for the results — they should show Cloudflare (
1.1.1.1) as your DNS provider.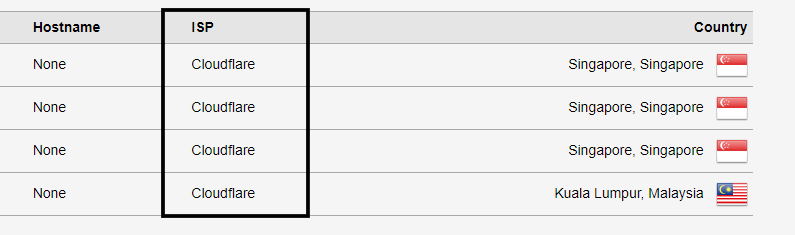
See also: