Create Product Categories
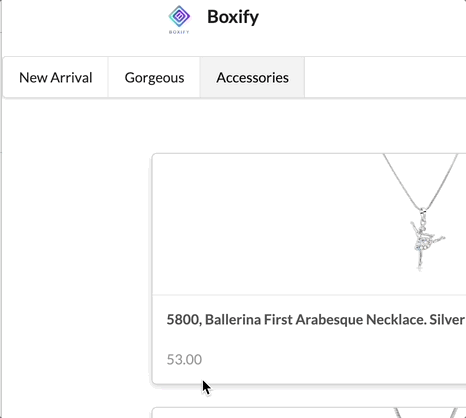
Categories group your products so customers can find them quickly — for example, “T-Shirts”, “Bags”, or “New Arrivals”. Your webstore will not display any products until you create at least one category.
Before you start
Section titled “Before you start”- Webstore must be enabled. Go to Setting › Parameters and tick Enable Webstore under the Shopping Cart section.
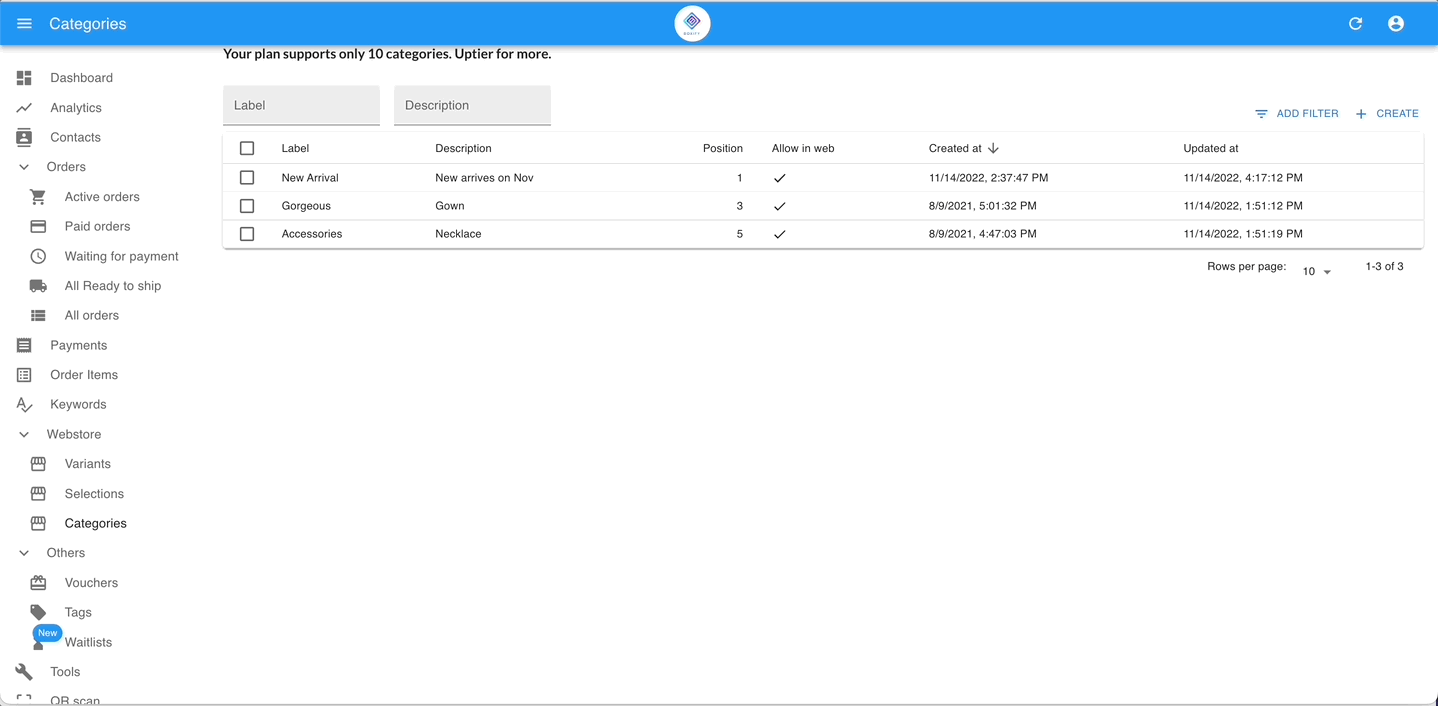
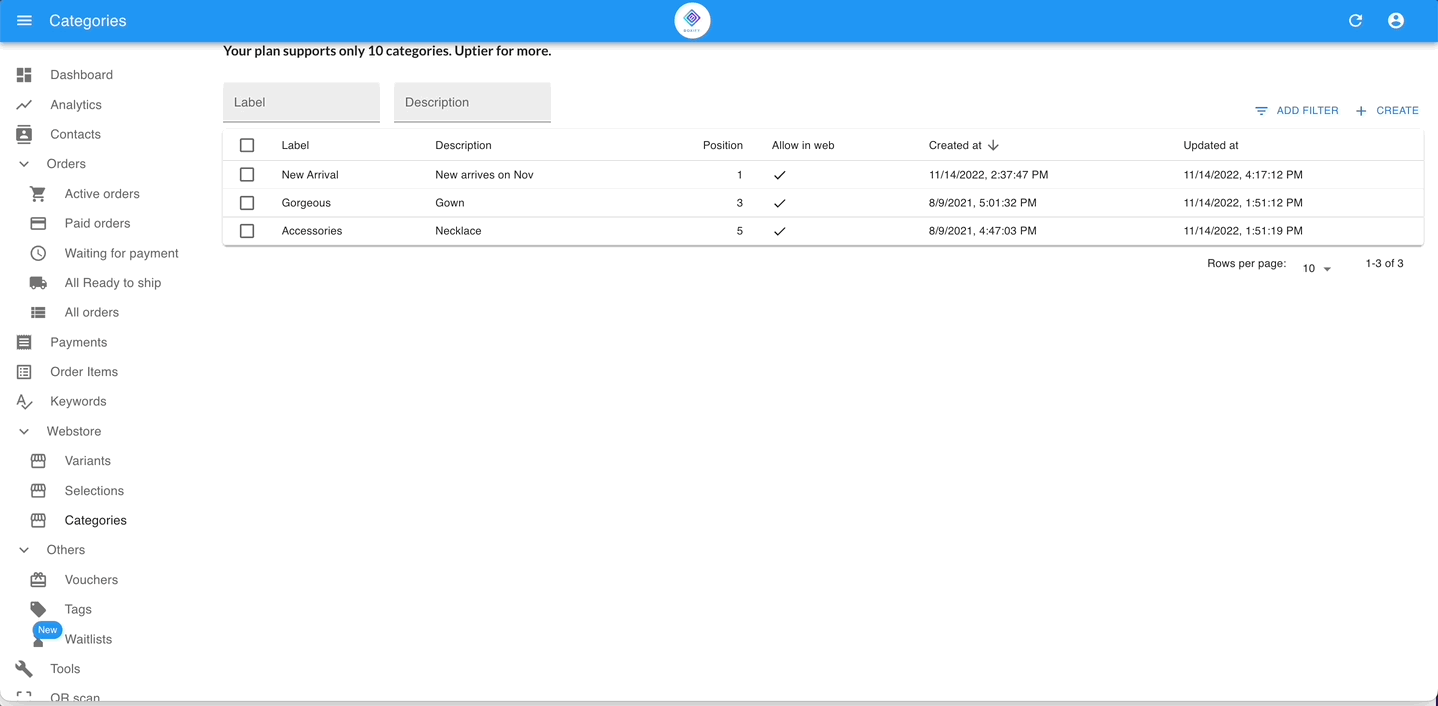
Create a category
Section titled “Create a category”- Go to Webstore › Categories.
- Click + Create Category.
- Enter the Category Name (for example, “T-Shirts”).
- Enter a Position number — this controls where the category appears. Position 1 appears first, position 2 appears second.
- Optionally add a Description or assign Selections (for example, “Color”).
- Click Save.
Assign a category to a product
Section titled “Assign a category to a product”Single product
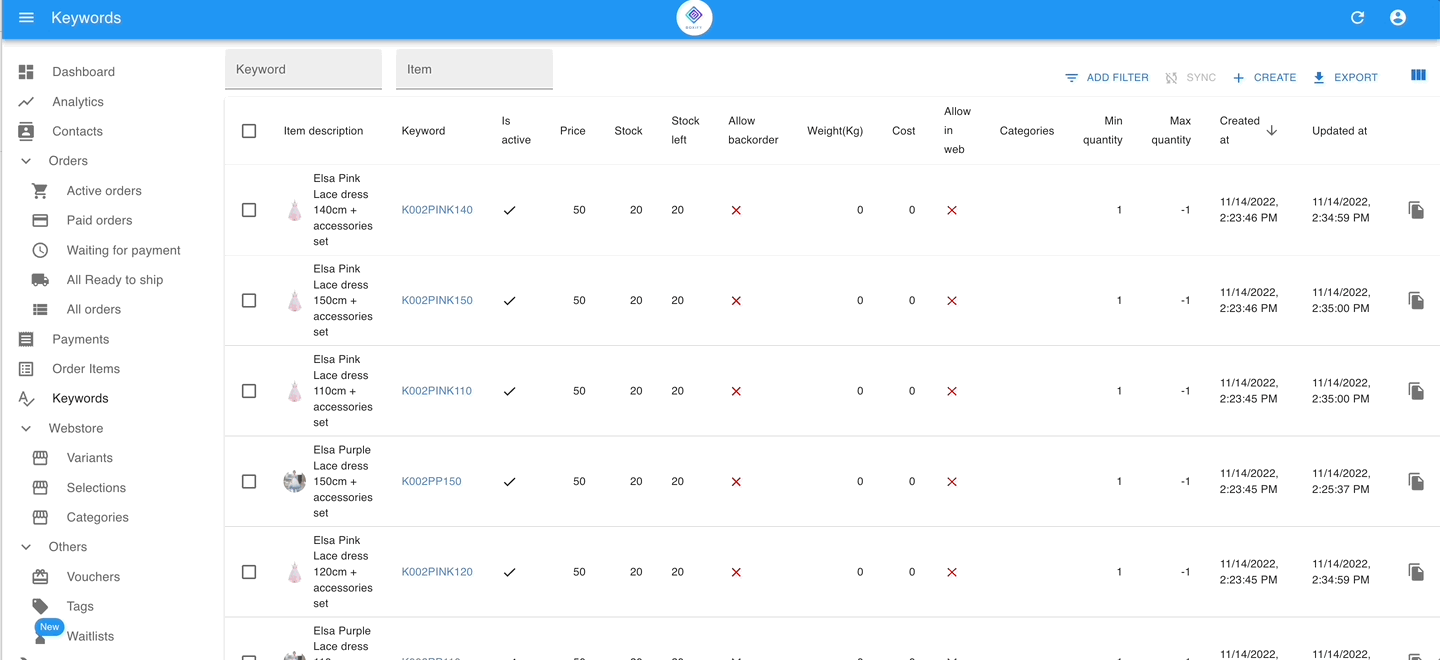
Section titled “Single product”- Go to Keywords.
- Click the product and choose Edit.
- Scroll to Category and choose the category this product belongs to.
- Click Save.
Multiple products at once
Section titled “Multiple products at once”- Go to Keywords.
- Select the products you want to update.
- Click Edit Categories & Variants.
- Tick the box for Category and choose the category to assign to all selected products.
- Click Save.