Getting Started Tutorial
![]()
This guide walks you through activating Boxify, setting up your first product keyword, and placing a test order.
Activate your account
Section titled “Activate your account”- Go to fb-live-admin.boxify.io.
- Click Continue with Facebook to log in.
- Choose your Facebook page and allow all the permissions requested.
- Select your page again inside the Boxify admin panel.
Create your first keyword
Section titled “Create your first keyword”A keyword is the word or code your customer comments to place an order. For example, a customer comments A1+1 to order one unit of item A1.
- Tap Keywords in the left menu.
- Tap the Create button.
- Fill in the item description, keyword, price, and stock quantity.
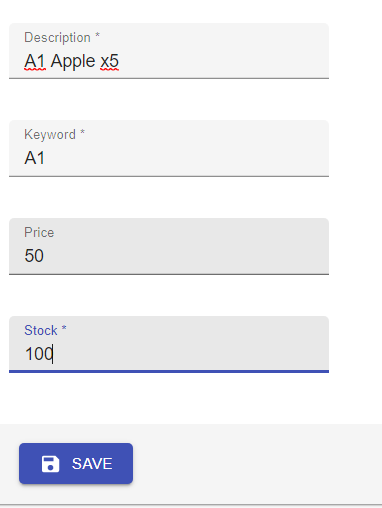
In the example above, the keyword is A1 for “Apple”, sold in sets of 5 at RM 50 each, with 100 sets available.
Place a test order
Section titled “Place a test order”Run through this process yourself before going live so you know exactly what your customers will experience.
-
From your personal Facebook account, comment your keyword and quantity on any post on your page — for example, comment
A1+1.
-
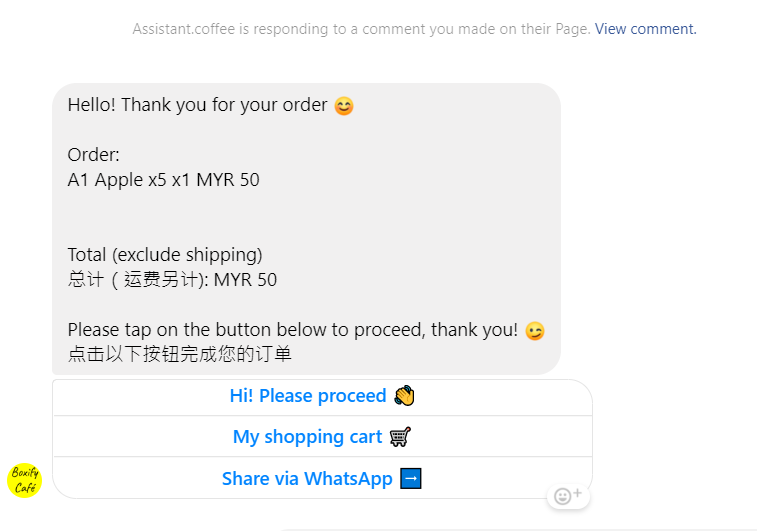
Boxify sends an order notification to your Facebook Messenger.
-
Tap the shopping cart button in the message.
-
Boxify sends you a payment link with your order details.
-
Tap the payment link to review the order.

-
The Important Info section shows your payment instructions, bank details, and any terms you have set. Contact Boxify sales to update this information.
-
Fill in your shipping details and select a shipping option. Contact Boxify sales to add or change shipping options.
-
Upload a payment receipt and tap Submit to complete the order.
See also: